Installing a fish finder might seem intimidating, but with the right setup, it’s surprisingly simple. Proper installation helps you get accurate sonar readings. It also makes sure your device performs reliably every time you’re on the water.
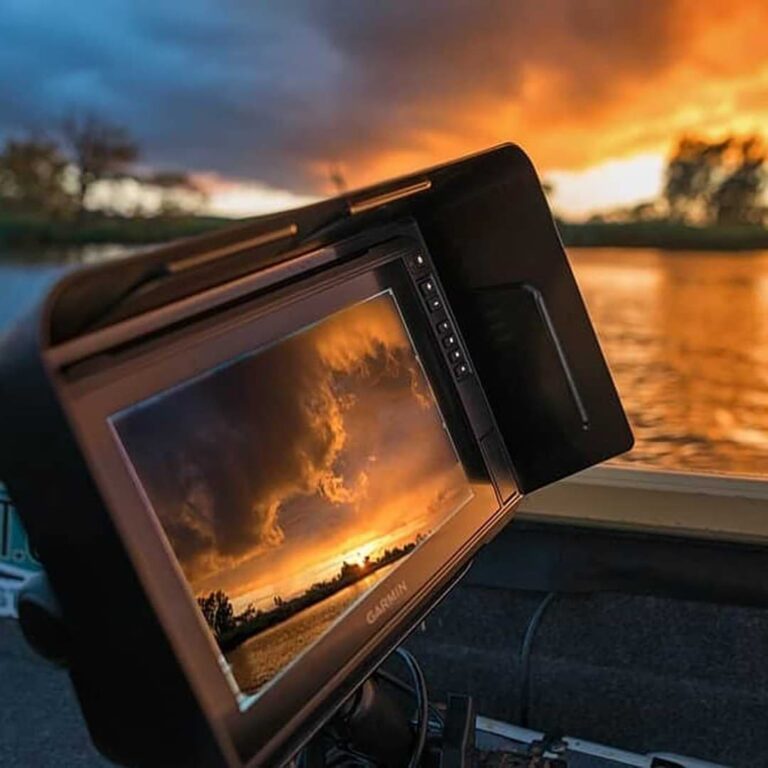
Adding a marine screen shade setup or visor enhances that performance by reducing glare, protecting the screen from water splashes, and extending battery life. Brands like BerleyPro offer visors that are designed for easy installation on Garmin, Lowrance, and Humminbird fish finders.
This guide will walk you through everything: from choosing the right spot for your unit to wiring it up and attaching a visor for better screen visibility.
1. Pre-Installation Checklist: What You Need Before You Start
Before you begin, make sure you’ve got all the tools, materials, and prep work completed.
1.1 Choosing the Best Mounting Position for Your Fish Finder
The right mounting location ensures accurate readings and keeps your fish finder accessible.
- For boats: Mount the unit on your console or dashboard. Make sure it’s in clear view but not in the way of controls.
- For kayaks: You’ll want a spot that won’t interfere with paddling. Use track mounts or side-arm mounts to stay flexible.
Also, keep it away from other electronics to avoid interference.
1.2 Tools & Equipment Needed for Installation
Gather these essentials:
- Mounting brackets
- Screws and bolts (usually provided with your unit)
- Power cables
- Drill (if holes are required)
- Marine sealant (for waterproofing, especially on boats)
DIY vs. Professional Installation: If you’re handy with tools and understand basic wiring, DIY is totally doable. If not, professional help may be worth it.
2. How to Install a Fishfinder on a Boat or Kayak
Whether you’re on a bass boat or a fishing kayak, the core process remains the same.
- Mount the display
- Install the transducer
- Connect the power
- Calibrate the settings
2.1 Installing the Transducer: The Most Important Step
Our transducer is the heart of your fish finder. It sends and receives the sonar signals that detect fish, depth, and underwater structure. Installing it correctly is important to getting accurate and consistent readings. A poor installation can result in distorted sonar returns, loss of signal, or complete malfunction of the system.
There are several mounting options to choose from, each with its own benefits and considerations:
- Transom mount: This is the most common option for boats. The transducer is installed at the back of the hull, just below the waterline. It’s easy to access and service, but it’s also exposed to water turbulence from the motor, which can affect readings if not positioned carefully.
- Thru-hull mount: This method involves drilling a hole through the bottom of the boat and installing the transducer so it sits flush with the hull. It offers highly accurate results and is often used in high-performance or larger vessels. However, it’s a permanent setup and requires professional installation due to the invasive nature of the install.
- In-hull mount: Perfect for kayaks or boats with solid hulls that don’t allow for through-hull installation. In this setup, the transducer is glued or epoxied to the inside of the hull, allowing sonar signals to pass through the hull material. While installation is non-invasive, accuracy can vary depending on hull thickness and material.
Regardless of the method you choose, the key is to ensure the transducer is perfectly level and remains fully submerged when the boat or kayak is at rest. A tilted or partially submerged transducer will produce inaccurate data, making your fishfinder unreliable.
Take your time with this step—even the best fish finder won’t perform well if the transducer isn’t installed properly.
2.2 Wiring the Fish Finder: Power & Connectivity
Powering your unit safely is just as important as mounting it.
- Use marine-grade wire for corrosion resistance.
- Connect the unit to a 12V battery (with fuse protection).
- Keep wires away from other electronics to avoid signal interference.
2.3 Fish Finder Display Setup & Calibration
Once powered, your display needs calibration:
- Adjust contrast, brightness, and sensitivity.
- Set depth range manually or enable auto mode.
- Choose the appropriate sonar mode (traditional, CHIRP, side-scan, etc.)
Proper calibration ensures you’re seeing accurate readings.
3. How to Install a Fishfinder Visor: Reduce Glare & Improve Visibility
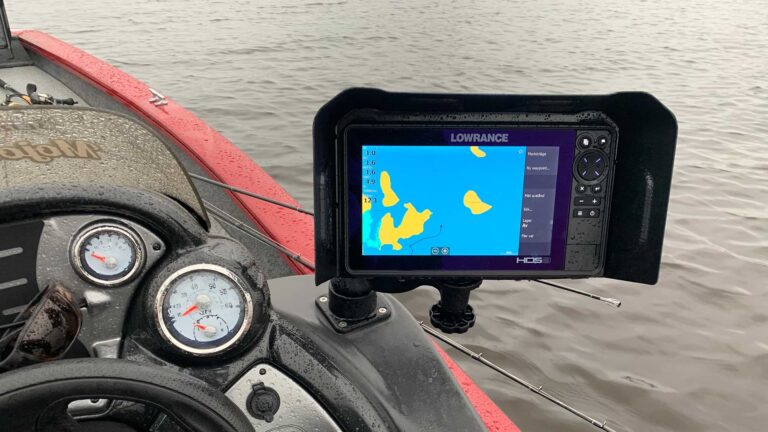
Fishfinder visors are underrated. They significantly improve usability in bright sun and protect your screen from salt spray, dust, and rain.
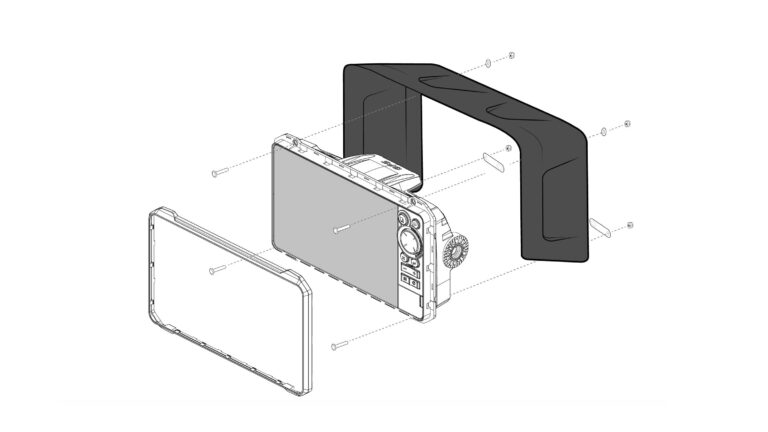
3.1 Step-by-Step Installation of a BerleyPro Fish Finder Visor
BerleyPro visors are designed to match specific fishfinder models for a seamless fit.
- Align the visor with your display
- Use the included screws to secure it to the bracket or frame
- Make sure the visor doesn’t block any buttons or ports
Most setups take less than 10 minutes to install.
3.2 Do Visors Affect Touchscreen Sensitivity?
No. BerleyPro visors are engineered to sit above the screen, not on it. This means the visor doesn’t come into contact with the touchscreen surface at all. Instead, it acts as a shade barrier, shielding the screen from overhead sunlight and environmental glare without obstructing your ability to interact with the display.
Whether you’re tapping through sonar modes, zooming in on depth maps, or adjusting sensitivity settings, you’ll still have full access to all touchscreen functions. The design accounts for various screen sizes and button layouts, ensuring that no part of the interface is blocked or compromised.
This makes BerleyPro visors an ideal choice for anglers using modern touch screen fish finders, where visibility and functionality go hand-in-hand. You’ll enjoy uninterrupted operation with enhanced screen clarity, even in bright outdoor conditions. In short, BerleyPro visors improve the user experience.
4. Troubleshooting Common Fish Finder Installation Problems
Things don’t always go smoothly. Here’s how to fix common issues:
- Sonar interference: Keep transducer and power cables away from trolling motor wires.
- Poor sonar readings: Recheck transducer angle and depth placement.
- Weak power connection: Make sure all wire connections are tight and properly fused.
5. Maintenance Tips: Keeping Your Fish Finder & Visor in Top Shape
Fish finders and visors are constantly exposed to the elements like, sun, salt, water, and dust. All of which can degrade their performance over time. That’s why routine maintenance is essential to keep your equipment functioning like new.
- Start by rinsing your fish finder and visor with clean freshwater after every outing, especially if you’ve been fishing in saltwater. Salt buildup can lead to corrosion of metal parts and clouding of the screen or visor surface. Make it a habit to do this before storing your gear.
- When cleaning, use only non-abrasive cloths such as microfiber. Avoid using rough fabrics or paper towels, which can leave micro-scratches on the display and visor. If you need to remove smudges or grime, a small amount of mild soap diluted in water will do the trick. Just avoid harsh chemicals or alcohol-based cleaners.
- Storage matters too. When not in use, keep your fish finder in a padded case or protective cover to prevent accidental bumps, scratches, or screen damage. This is especially important during transport or off-season storage.
- Finally, extend the life of your visor by applying a UV protectant spray. Over time, exposure to sunlight can cause plastic materials to become brittle or discolored. A marine-safe UV treatment will help maintain the visor’s clarity and structural integrity.
With just a few simple care habits, you can maximize the lifespan and performance of your fish finder and visor, ensuring your gear stays ready for your next fishing adventure.
Final Thoughts: Install It Right, Fish Smarter
A properly installed fish finder paired with a high-quality visor is a game changer on the water.
You’ll read sonar data more clearly, avoid battery drain, and protect your gear from the elements. Whether you’re in a kayak or on a boat, follow these steps and get the most out of your setup.
Ready to upgrade your rig? Explore BerleyPro’s fish finder visors and accessories to build your ideal marine screen shade setup.
FAQs:
How long does installation take?
Typically, 1–2 hours depending on the type of boat or kayak and your experience level.
Can I install a fish finder without drilling holes?
Yes. Many kayak mounts use track systems or adhesive pads. For boats, clamp mounts or suction cups can work in some cases.
Do I need professional help for installation?
Not always. If you’re confident with tools and wiring, it’s DIY-friendly. Otherwise, consider professional installation for a cleaner finish.


