This is how to install the BerleyPro Orb 360 degree kayak Light

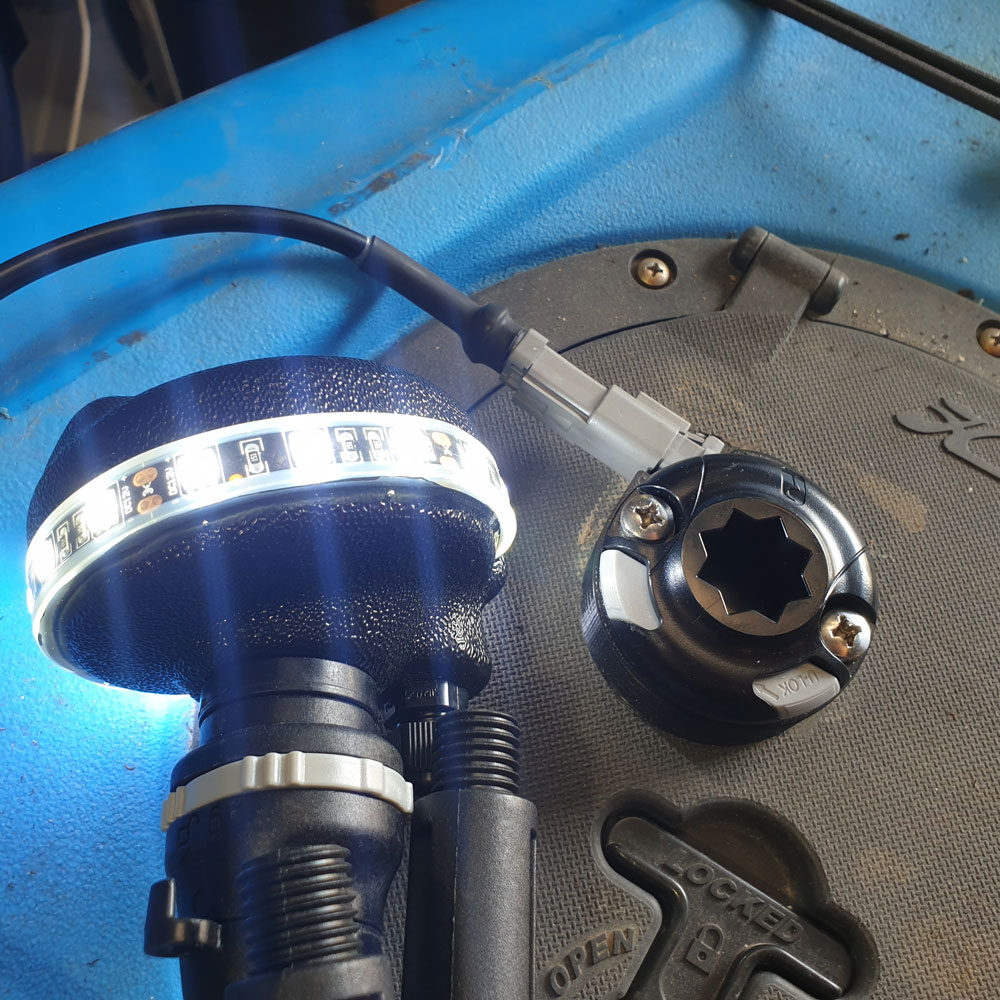
The BerleyPro Orb is the brightest 360 degree white kayak light on the market for your kayak. This one is installed onto the rear hatch of a Hobie® Outback, and also onto a Slayer Max 12.5 Propel. I would recommend putting this onto the kayak directly behind the seat to one side normally, but this is where the owner wanted this on the Hobie® Outback.

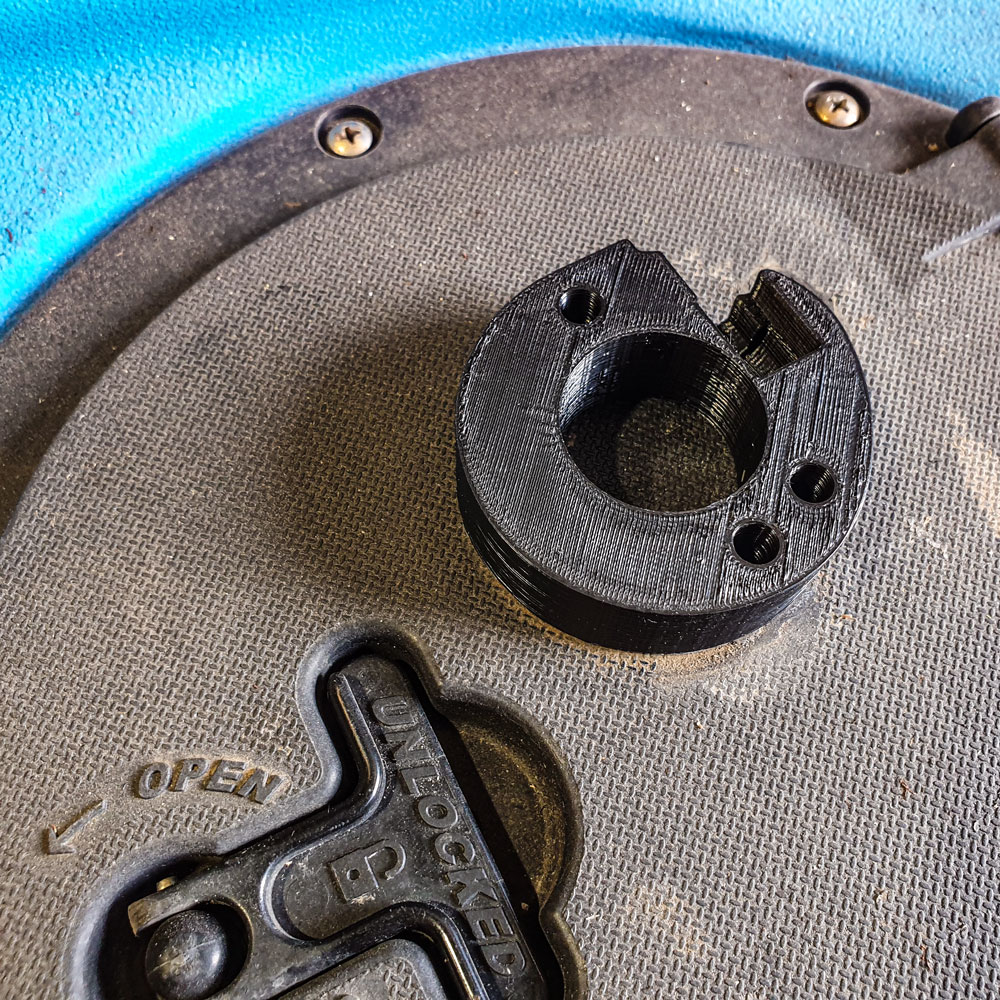
Firstly, we have a 3d printed base that you need to locate where you want the light to sit. Make sure there is enough room to get the plug that is attached to the orb, connected. The Deutsch connector is made to be inserted into the base with the Railblaza Starport fitting on top. 

The first photos are installing the Orb on the Hobie® Outback rear hatch. The owner of this kayak wanted it placed here, but we recommend putting it just behind the seat to the opposite side of where you normally cast if you want to use the light as a working light to shine over the cockpit. 

BerleyPro Orb Light Installation

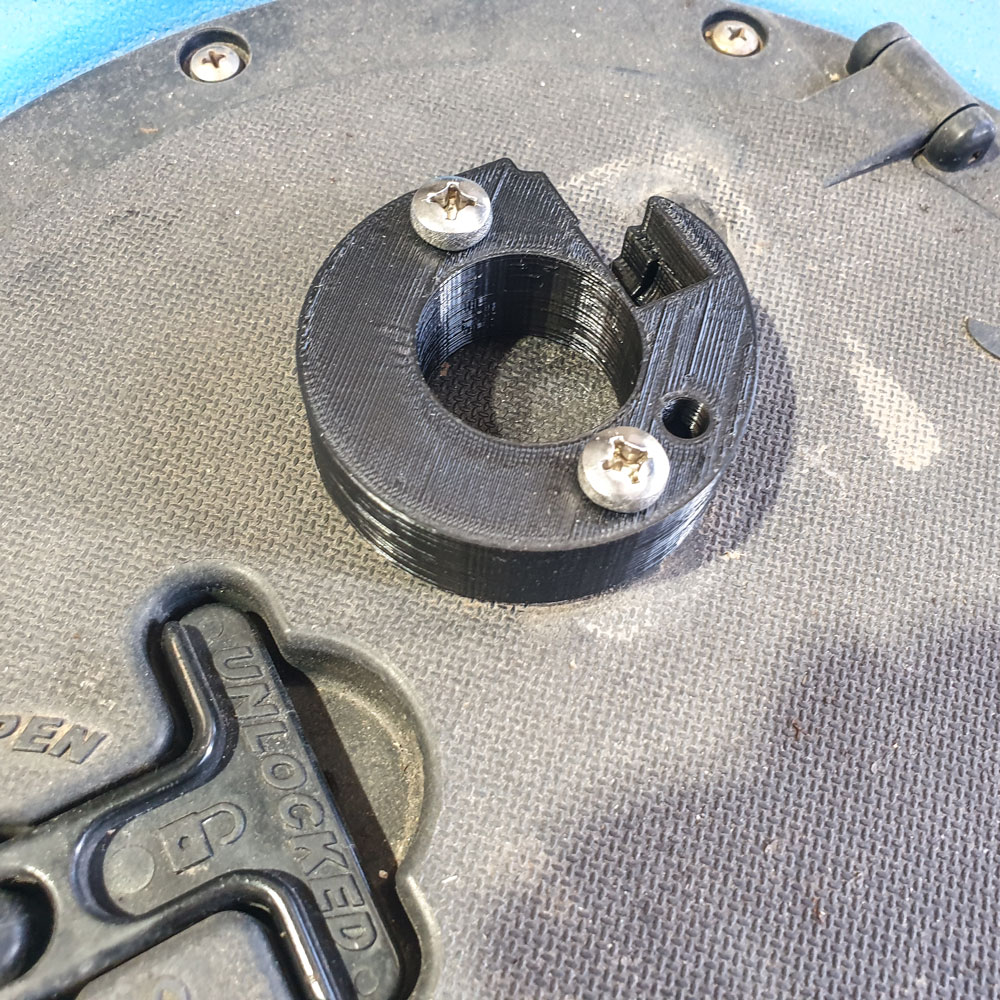
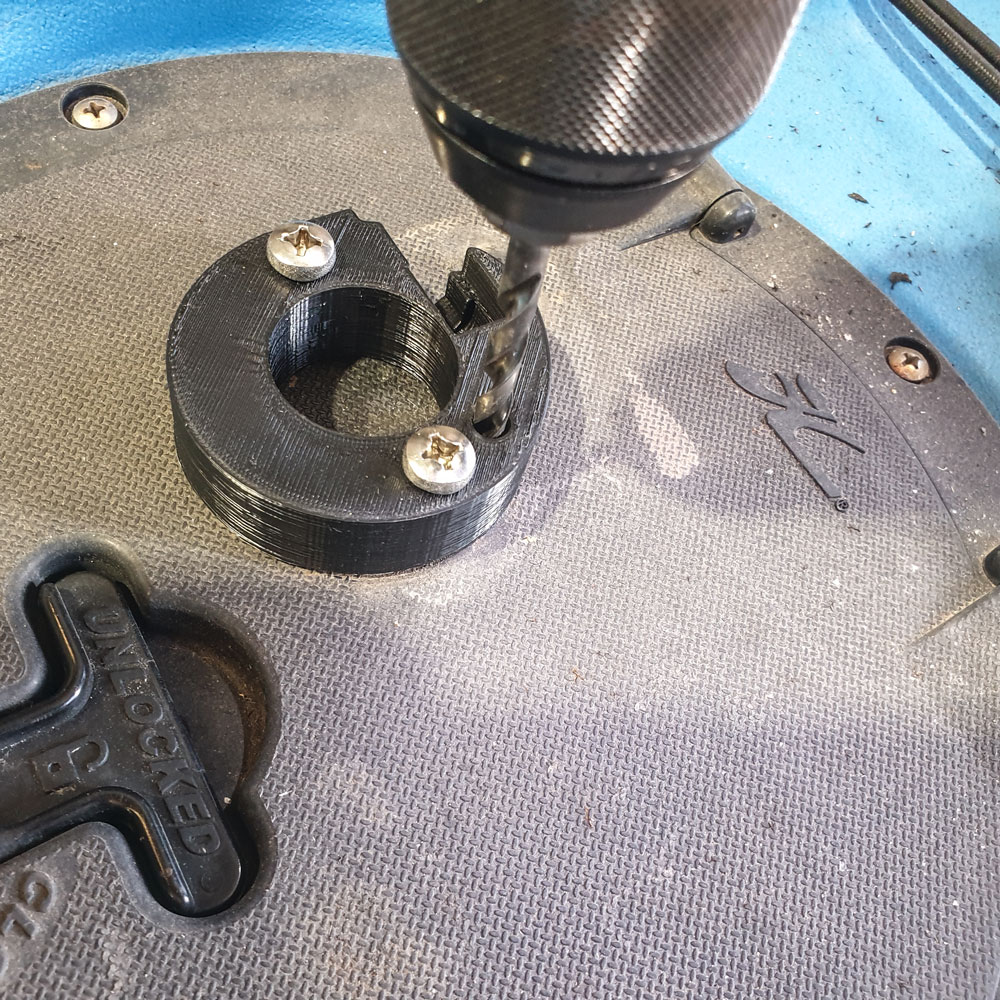
With a 6mm drill bit, drill the first two holes where the m6 x 40 Phillips pan head screws go through and then mark and drill through the 3rd hole where the cable will run through.
BerleyPro Orb Light Installation

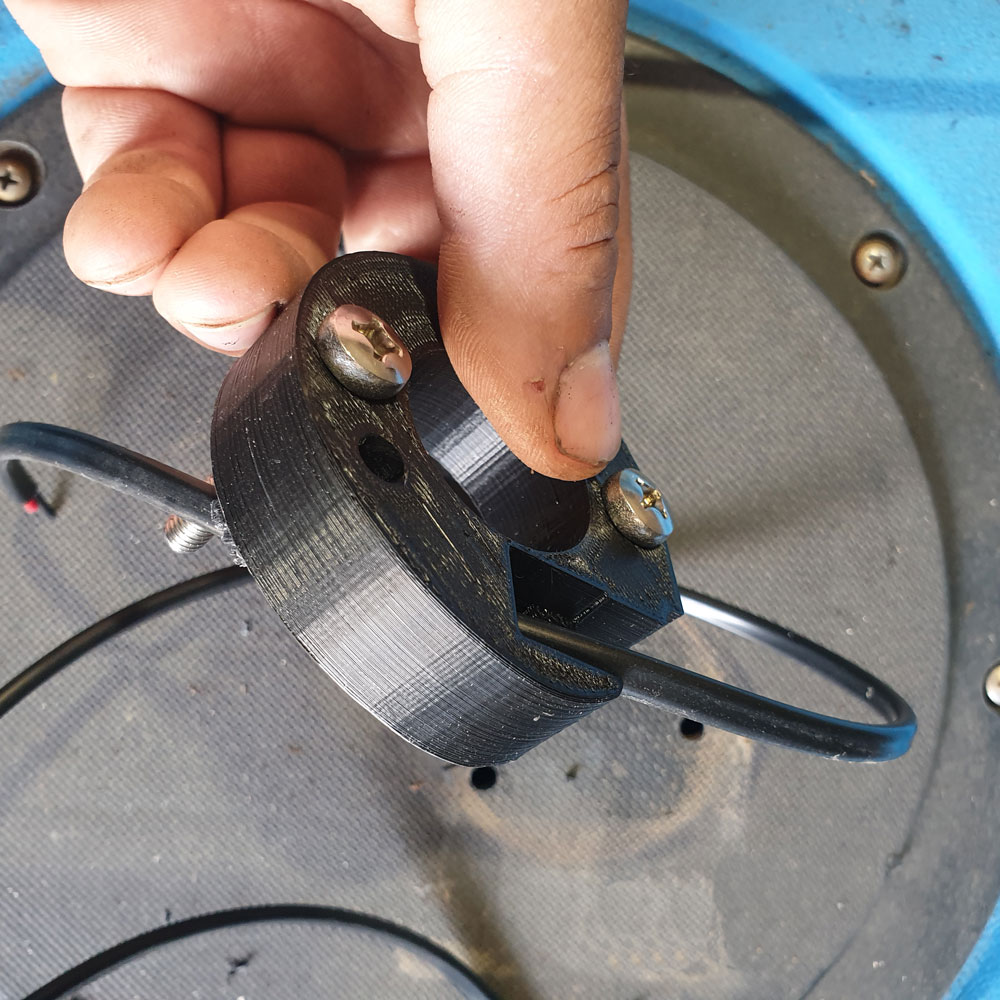
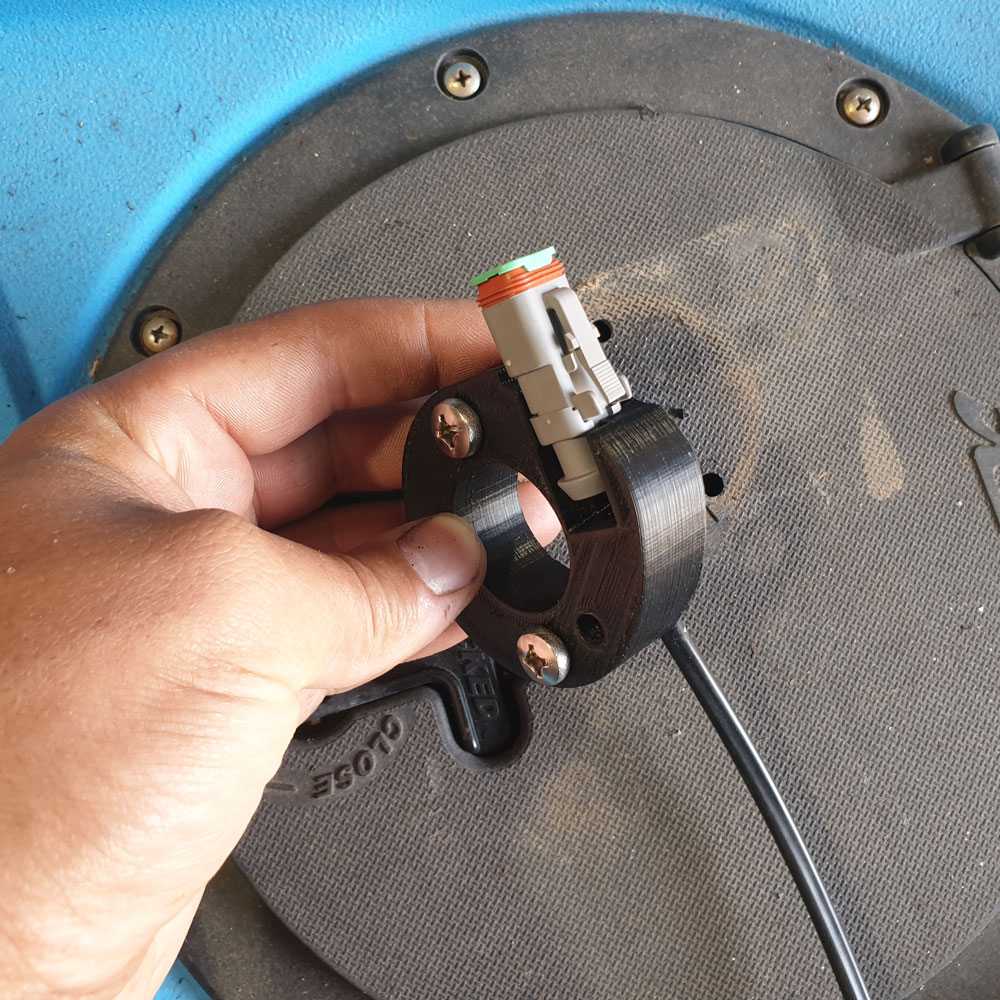
Install the cable through the 3d printed section as shown and push the plug down into the cavity.
BerleyPro Orb Light Installation

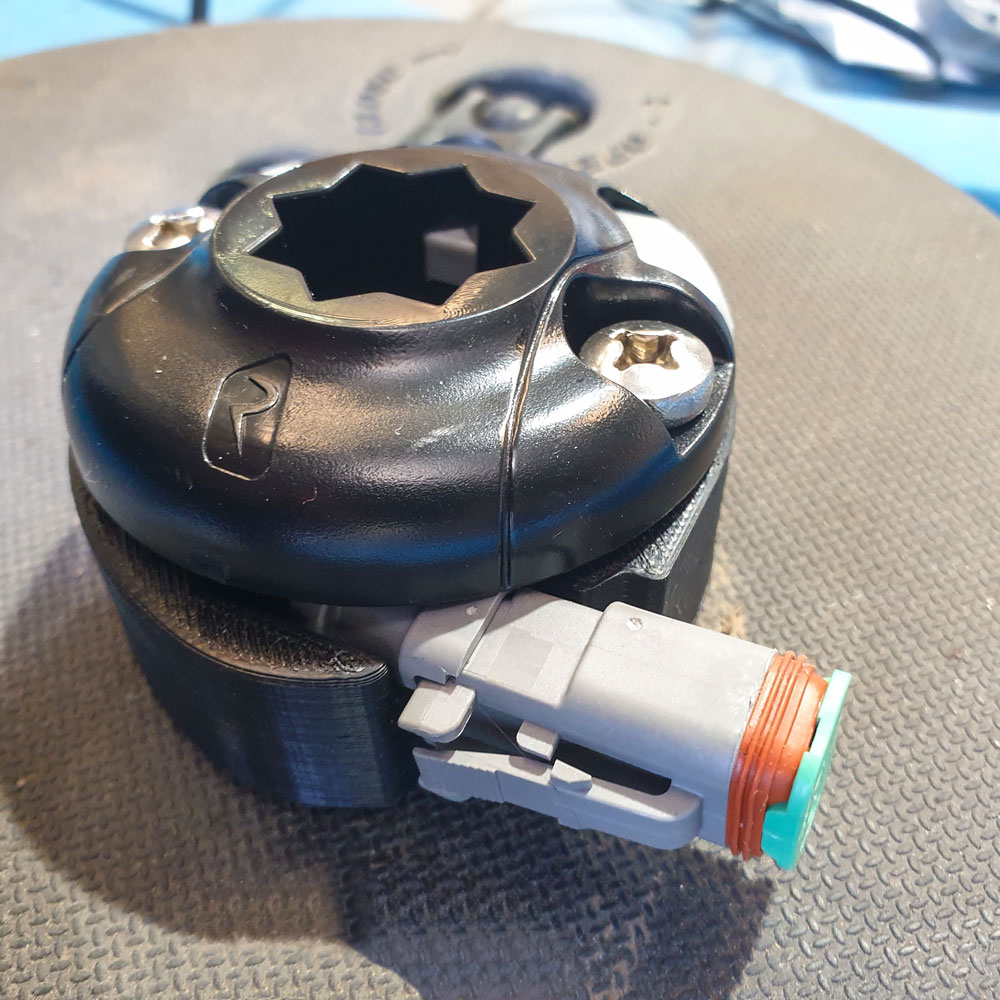
Install the RailBlaza StarPort down on the top of the connector using the m6 x 40 Phillips head screws, flat washers, and nylock nuts underneath. 

If you want to put the light somewhere you don’t have access to, this can be done easily using Well Nuts. On this Native Watercraft Slayer Max, we installed the light on the side of the kayak so it doesn’t interfere with the horizontal rod storage. We added a 90-degree Starport fitting to the base of the light so this would work. 

360 Kayak white light on slayer max

The same process is followed by placing the light base in a location that is easily accessible to plug it in and out and then drilling the 3 6mm holes.

360 Kayak Light Installation

The two mounting holes on this light will be drilled out to 9mm to fit the two well nuts. These need to be checked depending on the size of your well nuts so they will pull up on the kayak hull tight. The cable provided with the orb can also be fed through the kayak. 

360 kayak light with well nuts

Once the well nuts are installed and the cable is fed through where it needs to be the base can be installed on the kayak by inserting the screws into the well nuts. 

BerleyPro Eport assembled

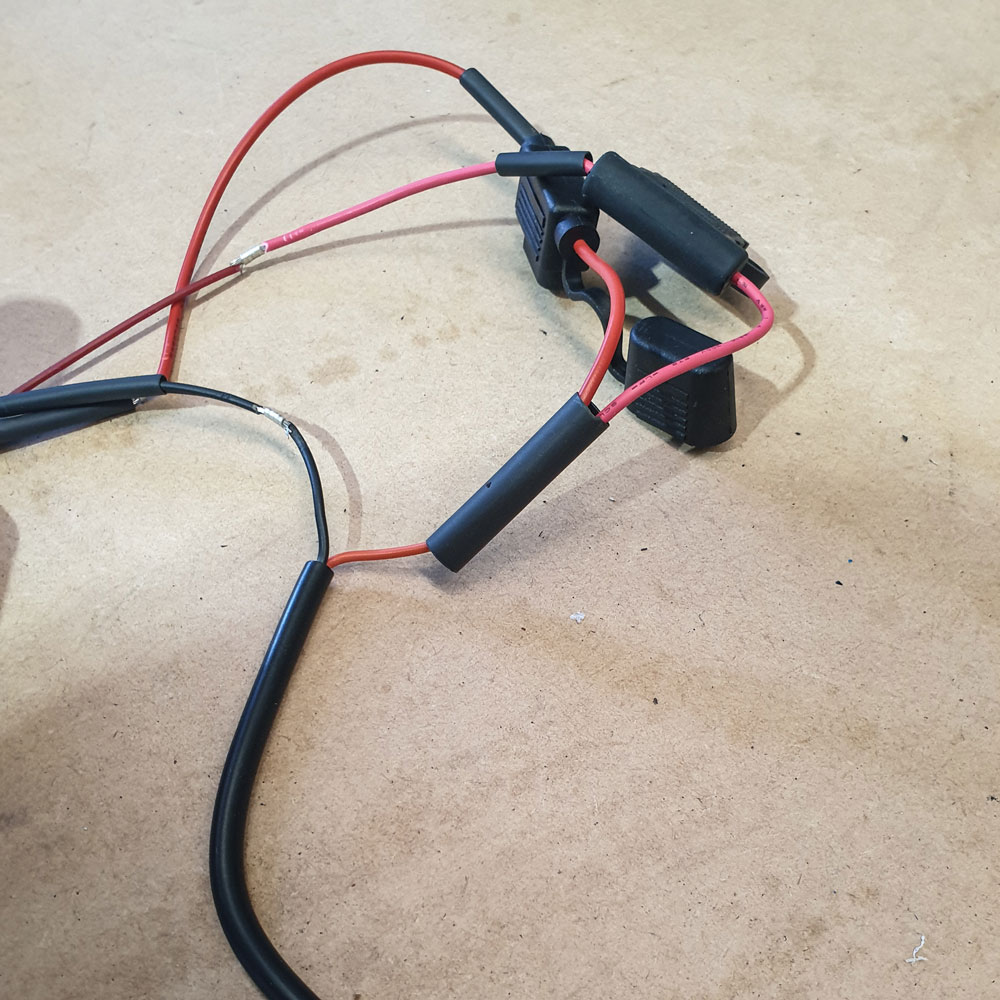
We have a wiring example showing how to connect the orb to a kayak with a fish finder also installed. This runs the orb and the fish finder at the same time wired in parallel. We have included a dimmer wired into this kayak but the wiring is the same. 


BerleyPro Orb Light Installation

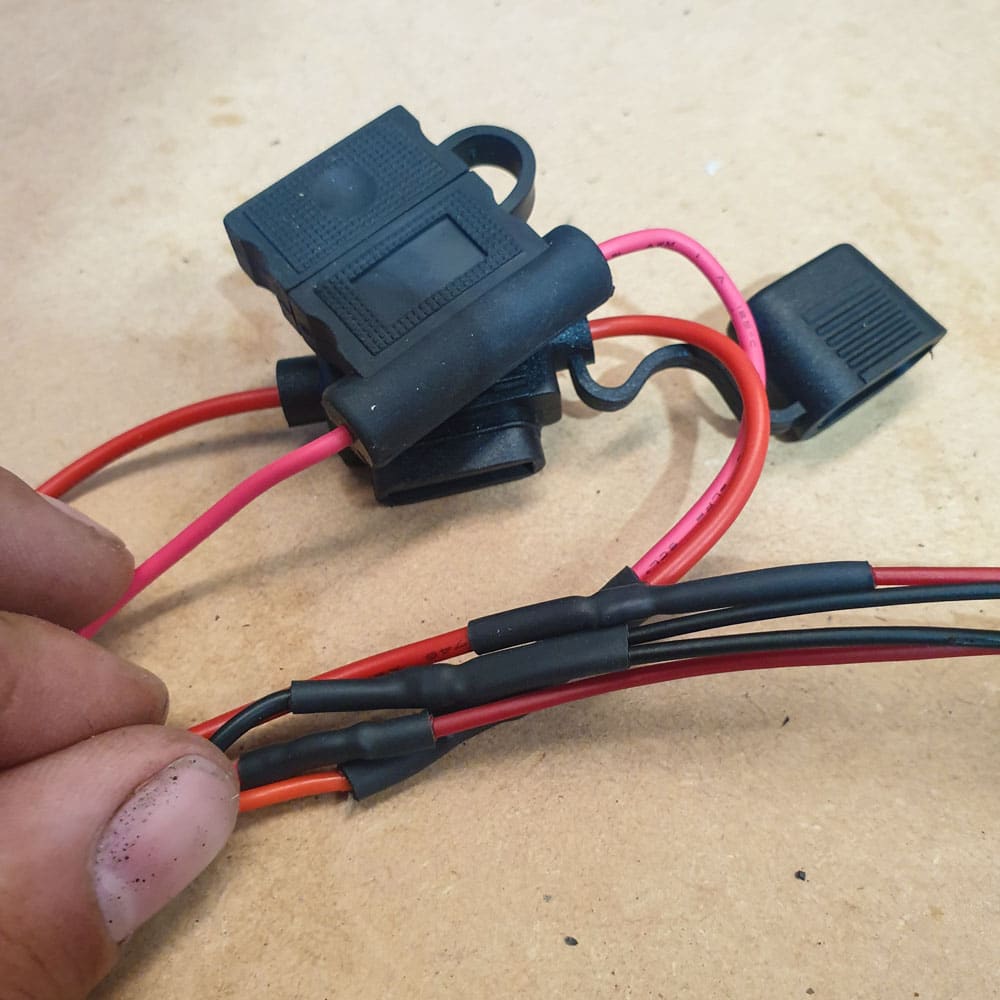
This kayak is running both a sounder and light connected to a 17.5A FPV battery. I’m installing it by connecting the two positive (red) wires to the positive (red) wire on the FPV connector and then the same with the two negative wires (black) to the single negative (black) wire on the FPV connector. We use crimps and dual wall heat shrink to wire the kayaks to provide a sealed connection. Obviously, joining 2 wires to 1 wire even with glue lined heat shrink won’t keep the water out so you can epoxy the join also after just shrinking 1 end of the cables. The reason we use crimps is to avoid soldered connections as these can become weak with vibrations.
BerleyPro Orb Light Installation

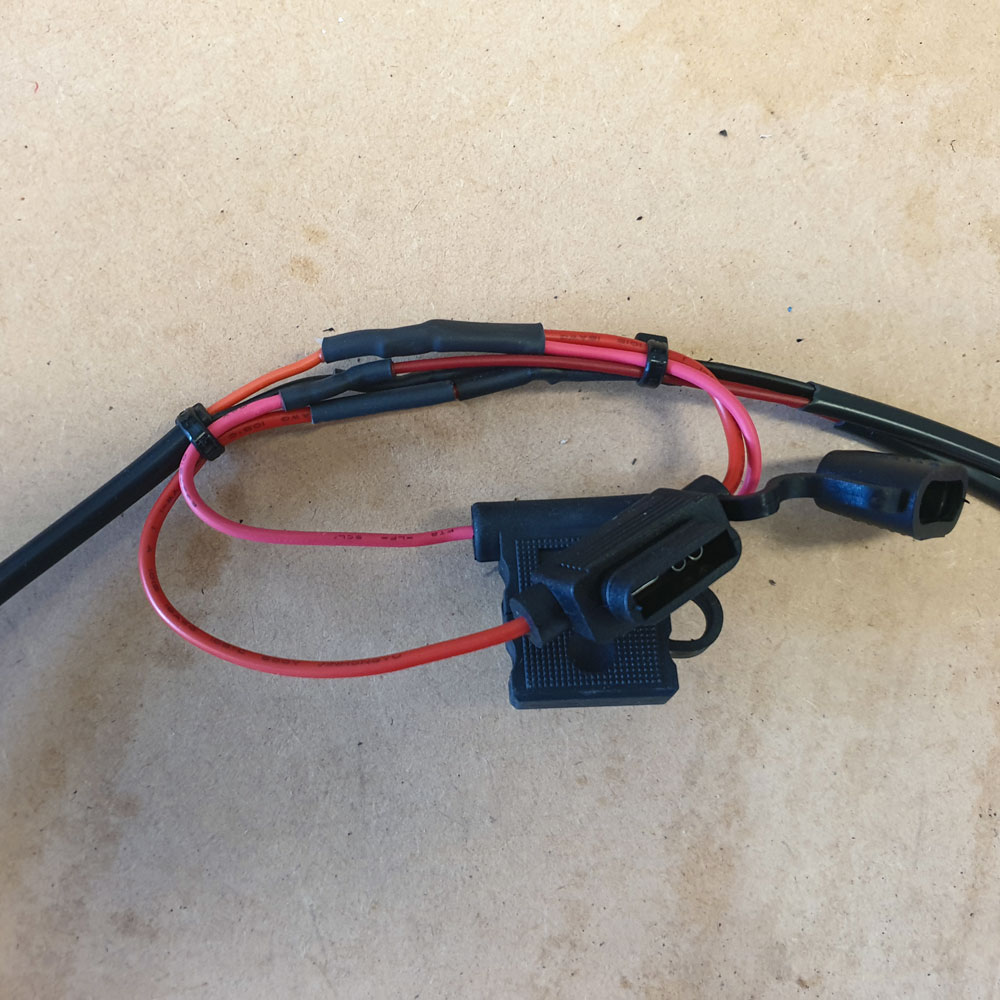
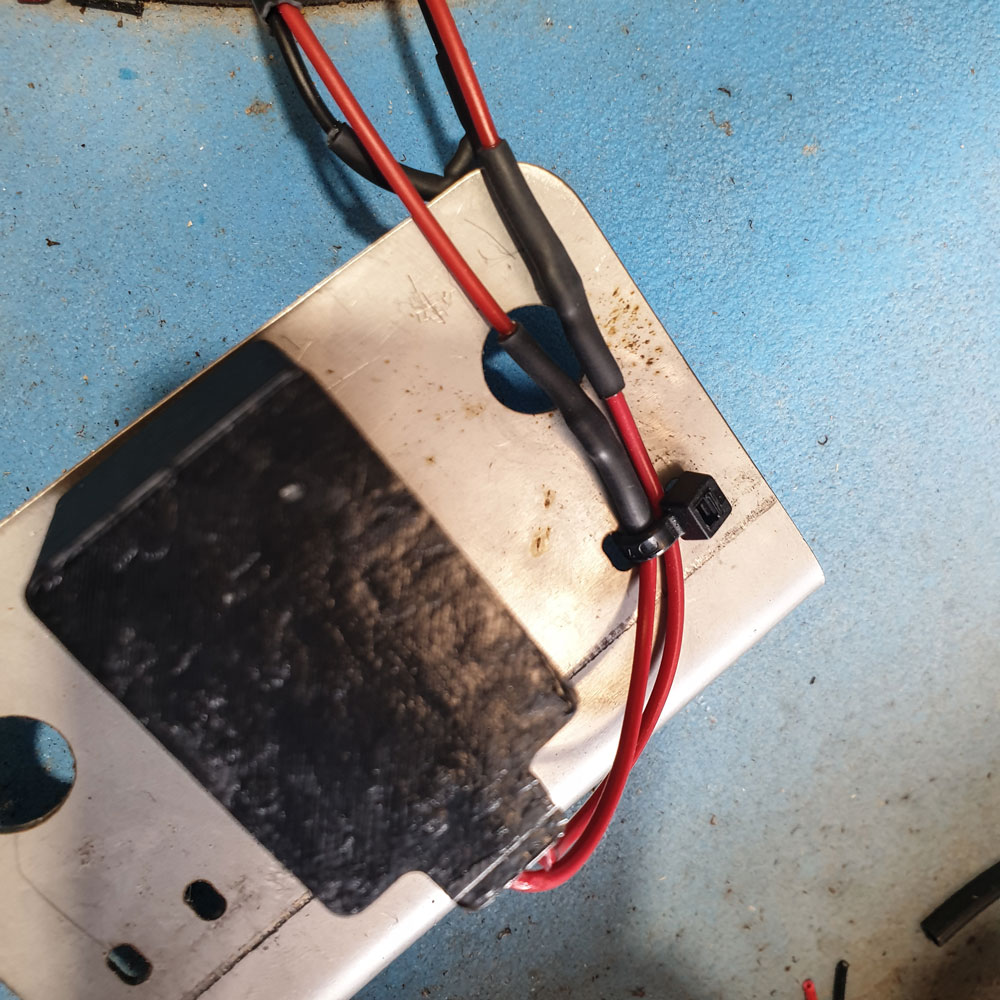
When joining your cables, its also great practice to stagger the joins. This ensures if they are rubbing together, there are no exposed connections that can touch each other.
BerleyPro Orb Light Installation

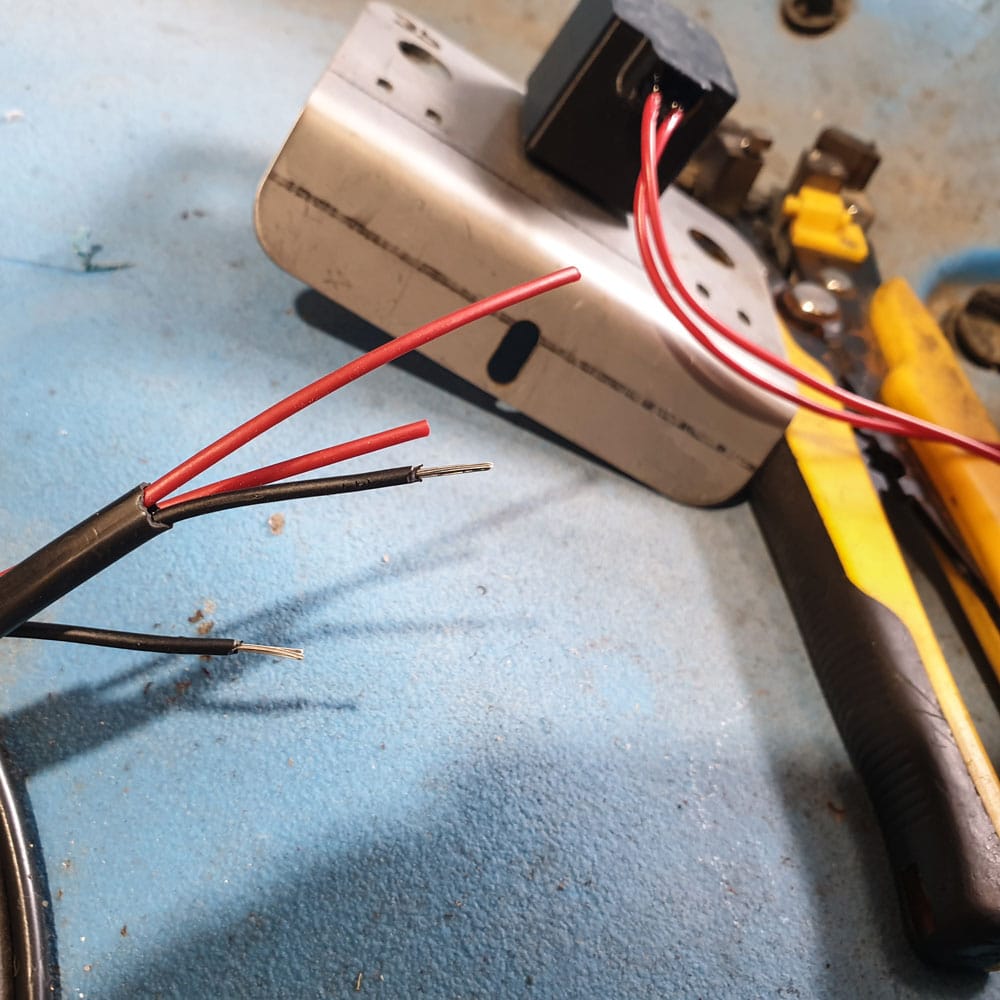
When finishing up we always secure the cables with ties, so no weight is hanging on the joins.
BerleyPro Orb Light Installation

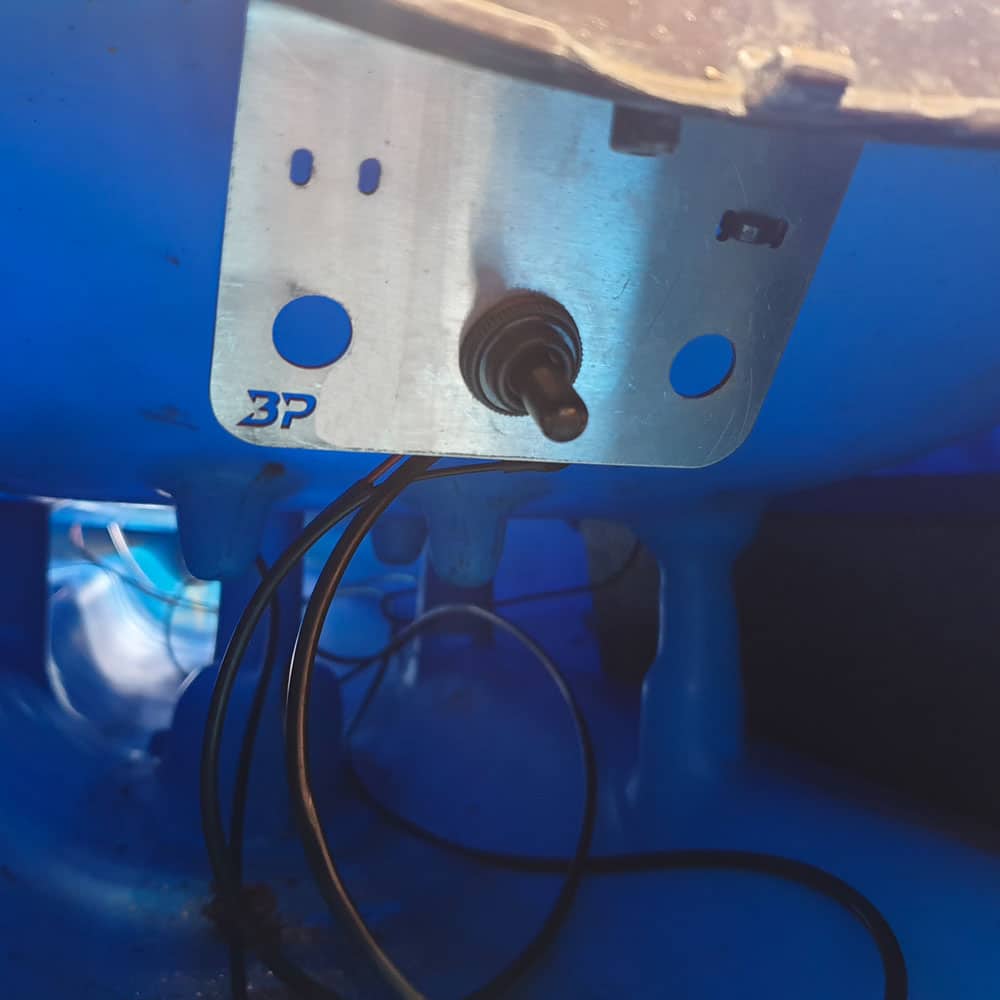
I personally don’t run a switch because of the low current draw and leave the light on day and night, but you can add one in quickly. Just run the cable down to where you want to put the switch and then cut the positive wire and wire the switch inline. Here we have one of our dimmers and switch mounts for inside the Hobie hatch. We always have put our switches on the inside of the kayak so they are out of the elements. 
BerleyPro Orb Light Installation

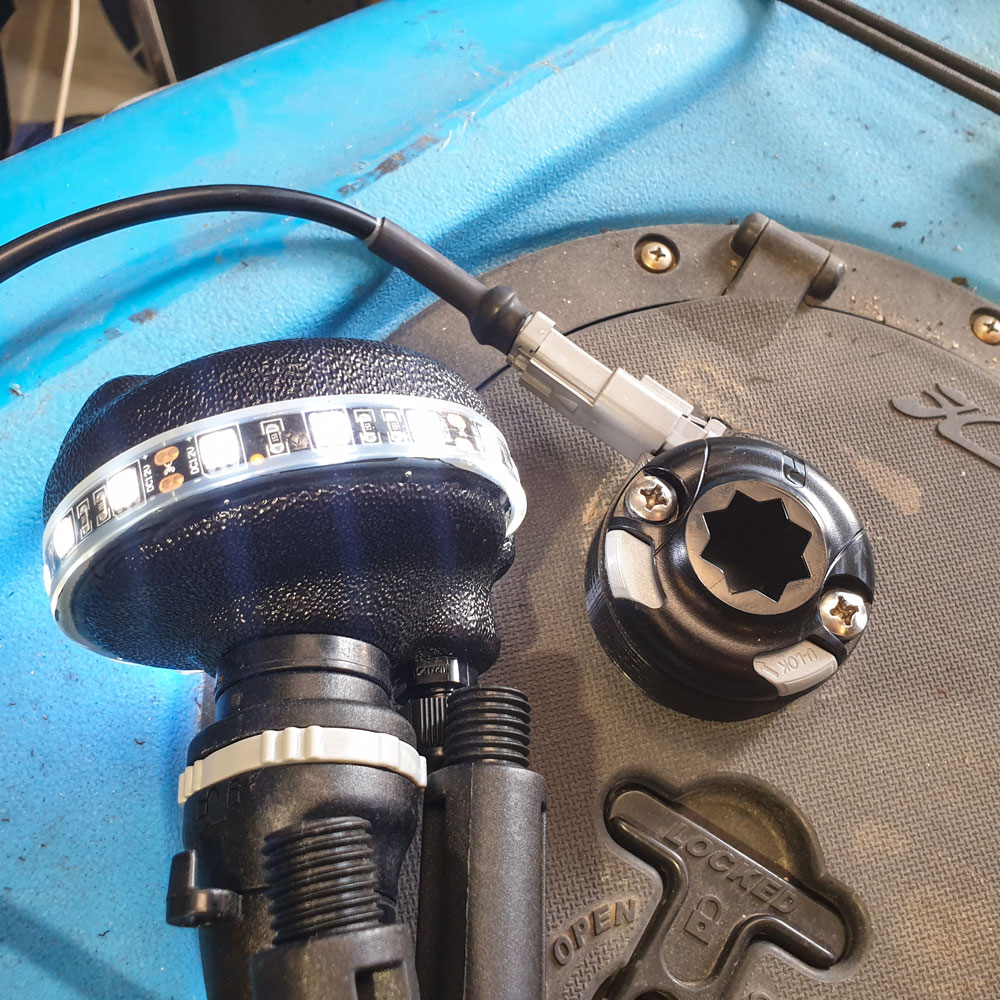
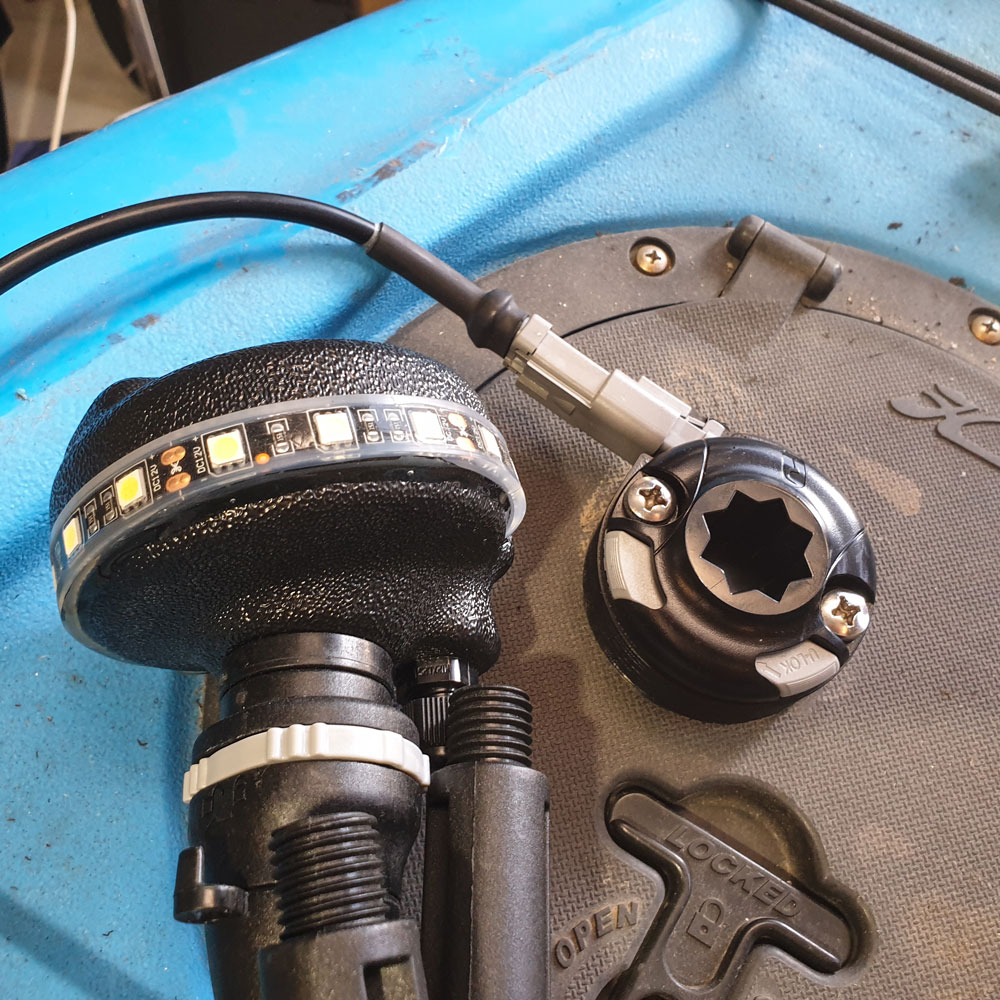
Once the wiring is all done, you can install the fuse, plug in the light, and test it. This one has a high/low and off setting.
BerleyPro Orb Light Installation

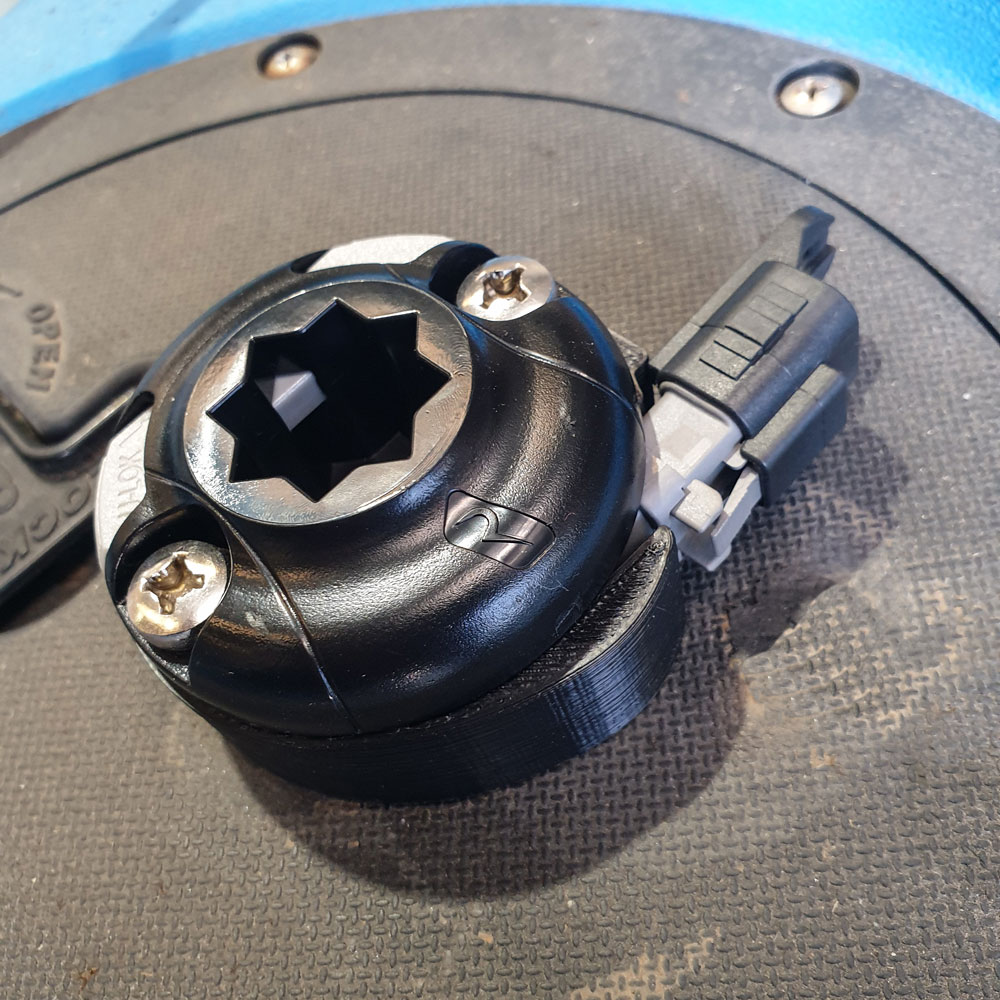
The last thing we provide is a blanking cap for the connector when not in use. We use gold plated terminals to have increased corrosion resistance, but we recommend to use this cap when not in use. Leave it in your car or somewhere dry when not using the light. The other thing that will increase how quickly it will corrode is if you leave the power connected to both your sounder and other outputs when not in use. We recommend always removing the battery. 
BerleyPro Orb Light Installation


Leave a Reply

Your email address will not be published. Required fields are marked *