Skip to main content Skip to footer
  • Shop
      VisorsLowranceGarminHumminbirdRaymarineSimradB&GSpray DeflectorRooster Rooter
      Electrical and LightingBattery MountsConnector Protector
      Kayak TrolleyKimmi Cart
      Kayak LoaderWill-I-Loader
      Tasline Premium BraidTasline Elite X8 Tasline Elite X12
      Storage and OrganisersMirage BroPrison PocketJig BucketSide BroStow Bro
      Sounder MountsTransducer MountsBow Mount Bro
      Kayak AccessoriesBumper Bro Kayak Keel GuardHobieNative WatercraftVibeStickers and Decals
      Apparel and MoreClothingCaps and Hats
      Catch Fishing TackleFishing RodsFishing ReelsHooksSoft PlasticsJig HeadsJigsStickbaits and PoppersTackle and Storage BoxesTools and Accesories
  • Dealers
  • Resources
    • Installation Guides
    • Marty's Angling Adventures
  • About
  • Contact
  • My Account

Kayak Accesories

  • Hobie
    • Lowrance Eagle Triple Shot Ready Transducer Mount for Hobie Lynx / Passport Installation Guide
    • Installing a BerleyPro Bottom Drawer on a Hobie Outback
    • Hobie Passport/Lynx Hummingbird Compact SI Transducer Mount Installation Guide
    • Lowrance Eagle Triple Shot Ready Transducer Mount for Hobie Installation Guide
    • Krakka Yakkaz Hobie Compass Seat Risers
    • Nocqua Battery in a Hobie Pro Angler
    • Titan Tracks – Hobie Outback Installation
    • Hobie Pro Angler 14 Bumper Bro Installation
    • Hobie Passport 10.5 Bumper Bro Installation
    • Hobie Outback – Brudder Installation
    • Hobie Compass Lowrance Elite 9 FS Chart Plotter Installation
    • Hobie Mirage Lynx Side Bro Installation
    • Hobie Lynx/Passport Sidescan Transducer Mount Installation
    • Hobie Lynx Rear Bumper Bro Installation
    • Hobie Kayaks Passport 12 Bumper Bro Installation
    • Hobie Kayaks Outback (2019+) Bumper Bro Installation
    • Hobie Kayaks Compass Bumper Bro Installation
    • Hobie Kayaks Lynx Bow Bumper Bro Installation
    • Hobie Compass Seat Risers Installation
  • Native Watercraft
    • Native Watercraft 3″ Rudder Upgrade Install Guide
    • Native Water Craft Slayer Max / Titan X Rudder Upgrade install
    • Slayer Seat Risers
    • Slayer 10/13/Manta Propel Aluminium Handle Upgrade Installation
    • Titan Carry Handle Installation
    • Native Watercraft Ultimate FX Propel Live Well
    • Native Watercraft Titan Steering Installation
    • Native Watercraft Steering Tension Plate Installation
    • Native Watercraft Slayer Max Aluminium Handle Upgrade Installation
    • Native Watercraft Slayer 13 Bumper Bro Keel Protection Installation
    • Native Watercraft Slayer Max Steering Upgrade
    • Native Watercraft T-Lock Steering Installation
  • Crescent
    • Crescent Shoalie Bumper Bro Installation
    • Crescent Crew Bumper Bro Installation
    • Crescent CK1 Venture Bumper Bro Installation
    • Crescent CK1 Venture Rear Bumper Bro Installation
  • NuCanoe
    • NuCanoe UNLIMITED Bumper Bro Installation
    • NuCanoe Frontier 12 Bumper Bro Installation
  • Jackson
    • Jackson Bite FD Bumper Bro Installation
  • Old Town
    • OLD TOWN SPORTSMAN PDL 120 BUMPER BRO INSTALLATION
    • TITAN TRACKS – OLD TOWN INSTALLATION
    • Old Town Sportsman Autopilot 120 Bumper Bro Installation
  • Bonafide
    • Bonafide P127 Bumper Bro Installation
  • BOTE
    • BOTE HD Board Bumper Bro Installation
  • K2Fish
    • K2Fish Next GEN 11.5 Transducer Mount Installation
  • Vibe
    • Vibe Kayaks Sea Ghost 110 Bumper Bro Installation
    • Vibe Kayaks Shearwater 125 Bumper Bro Installation
  • Bumper Bro
    • BerleyPro Bumper Bro Kayak Keel Guard Installation
    • Bumper Bro Adjustment Process
  • Kimmi Cart
    • Kimmi Cart – C Tug Axle Assembly
    • Kimmi Cart – Wheeleez 24/30cm Wheel Axle

Fishfinder Accessories

  • Visors
    • Garmin
      • Garmin Echomap UHD2 Touch – Visor Installation
    • Lowrance
      • Lowrance Eagle Triple Shot Ready Transducer Mount for Hobie Lynx / Passport Installation Guide
      • Lowrance Eagle Triple Shot Ready Transducer Mount for Hobie Installation Guide
      • Lowrance Eagle 7″ and 9″ – Visor Installation
      • How To Show Battery Voltage On a Lowrance TI Fish Finder
      • Lowrance TripleShot Ready
      • Lowrance Active Imaging 3-in-1 Transducer Installation on a Hobie
      • Lowrance Elite 5 HDI – Visor Installation
      • Lowrance HOOK Reveal 7″ and 9″ – Visor Installation
      • Lowrance HOOK2/HOOK Reveal 5 – Visor Installation
      • Lowrance HDS Live – Visor Installation
    • Simrad
      • Simrad – Visor Installation
  • Transducer Mounts and Accessories
    • Lowrance Eagle Triple Shot Ready Transducer Mount for Hobie Lynx / Passport Installation Guide
    • Lowrance Eagle Triple Shot Ready Transducer Mount for Hobie Installation Guide
    • Rooster Rooter – Garmin Installation
    • Rooster Rooter – Installation Guide for Lowrance (Simrad) ActiveImaging HD 3-in-1 FishReveal Transducer
    • StructureScan 3d Transducer mount for a Hobie
  • Connector Protector
    • Connector Protector Installation
  • Tips And Tricks
    • Fitting a Fishing Gimble / Fighting Belt Correctly
    • Rigging Up A Soft Plastic
    • Marine-Proofing Your GPS and Fish Finder: Tips and Tricks for Long-Lasting Performance
    • How to Show Battery Voltage On Your Lowrance Fish Finder
    • How to look after your electronics when installing a fish finder on a kayak

Storage and Organisers

  • Kayak Storage and How to Set Up Your Kayak

Electrical and Lighting

  • BerleyPro Orb 360 Degree Kayak Light Installation
View Categories
  • Home
  • Guides
  • Fishfinder Accessories
  • Tips And Tricks

How to look after your electronics when installing a fish finder on a kayak

When installing a fish finder on a kayak there are some critical things you should be doing to make sure it lasts. #

Quite often it can be quite an expensive investment so it is worthwhile making sure that it is looked after correctly. There are many advantages of having a fish finder on your kayak, arguably the most important is because a kayak moves so slow you might as well make the most of your time when casting or dropping lures where the fish are, instead of just in water. In this blog, I am using my Raymarine Element 9 on my Hobie Compass kayak to show you what I have done which has been reliable over the years. Corrosion…

Snapped Terminals…

Broken Fish Finders…

Costly Repairs…

We’ve all been there. Everyone will tell you electronics shouldn’t be used on a kayak, but why would you go fishing without knowing what’s in the water around you?! I’ve personally been through my fair share of units, but I’ve found a bunch of simple techniques that can help you get the most out of your wiring and units.

Water proof fuse holder in kayak
How to look after your electronics when installing a fish finder on a kayak 7

The inside of your hull is always going to collect water. I have never seen a kayak that stays completely dry, and because of this I make sure that all the wire joins, connectors or any other exposed connection they are always tied up off the base of the hull. This photo has an FPV waterproof fuse holder connected to the power cable of the Raymarine Element 9. I’ve drilled a hole through the bottom ring of the 8-inch hatch in the Hobie Compass, and cable tied the fuse holder up off the bottom. The location has no way for the connector to the FPV battery to drop down and touch the base of the hull.
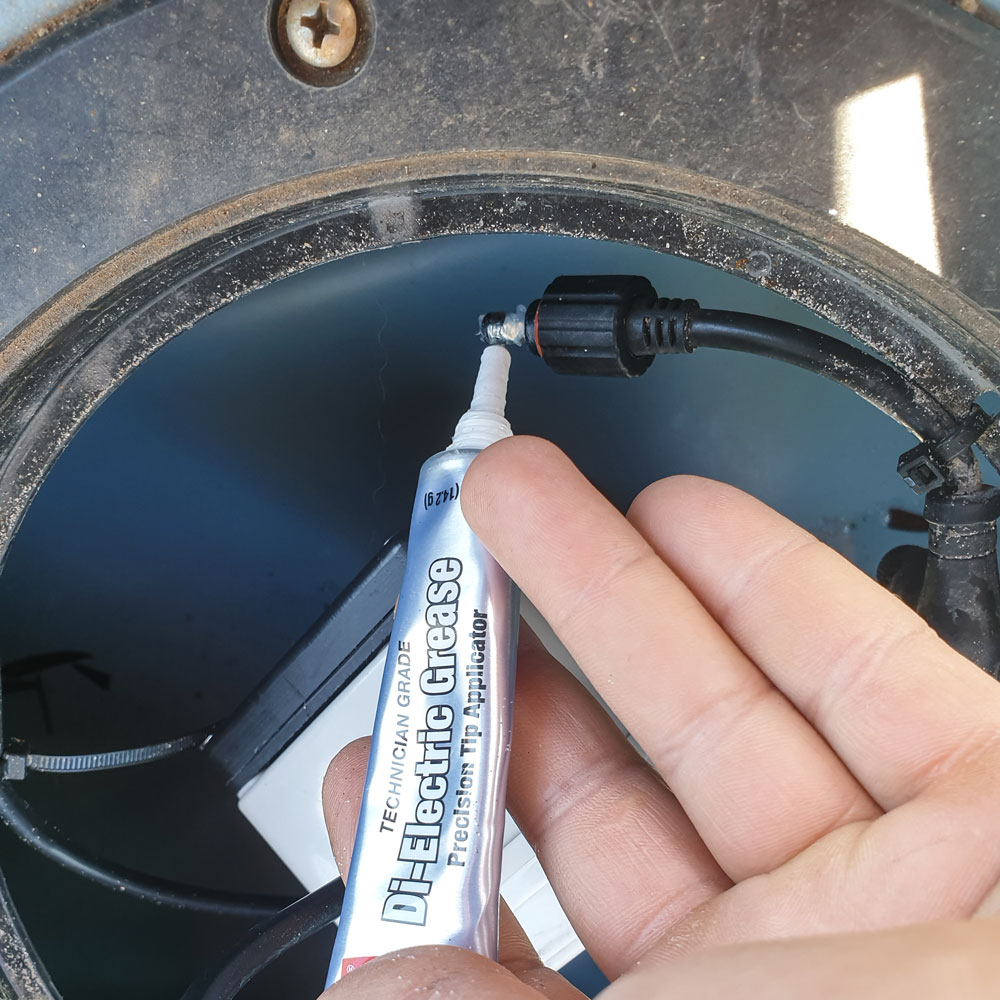
Di-Electric grease used to keep connections dry
How to look after your electronics when installing a fish finder on a kayak 8

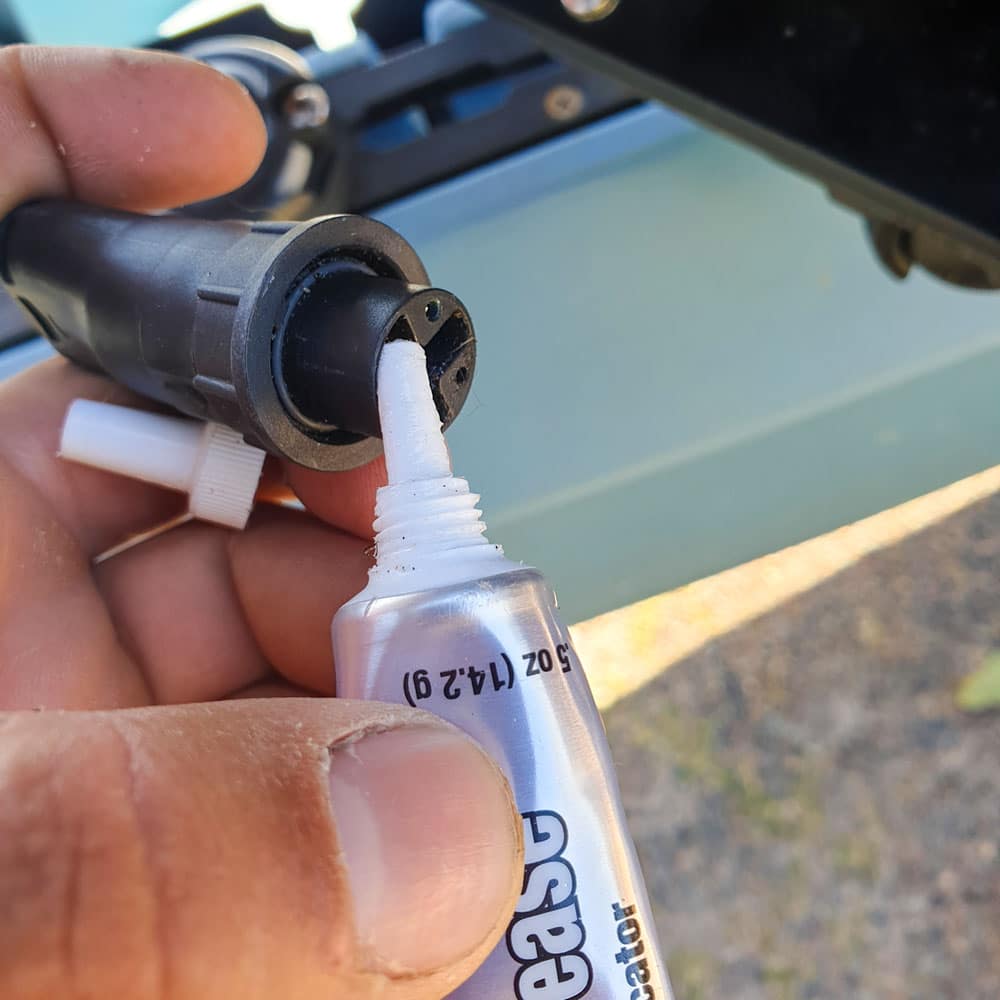
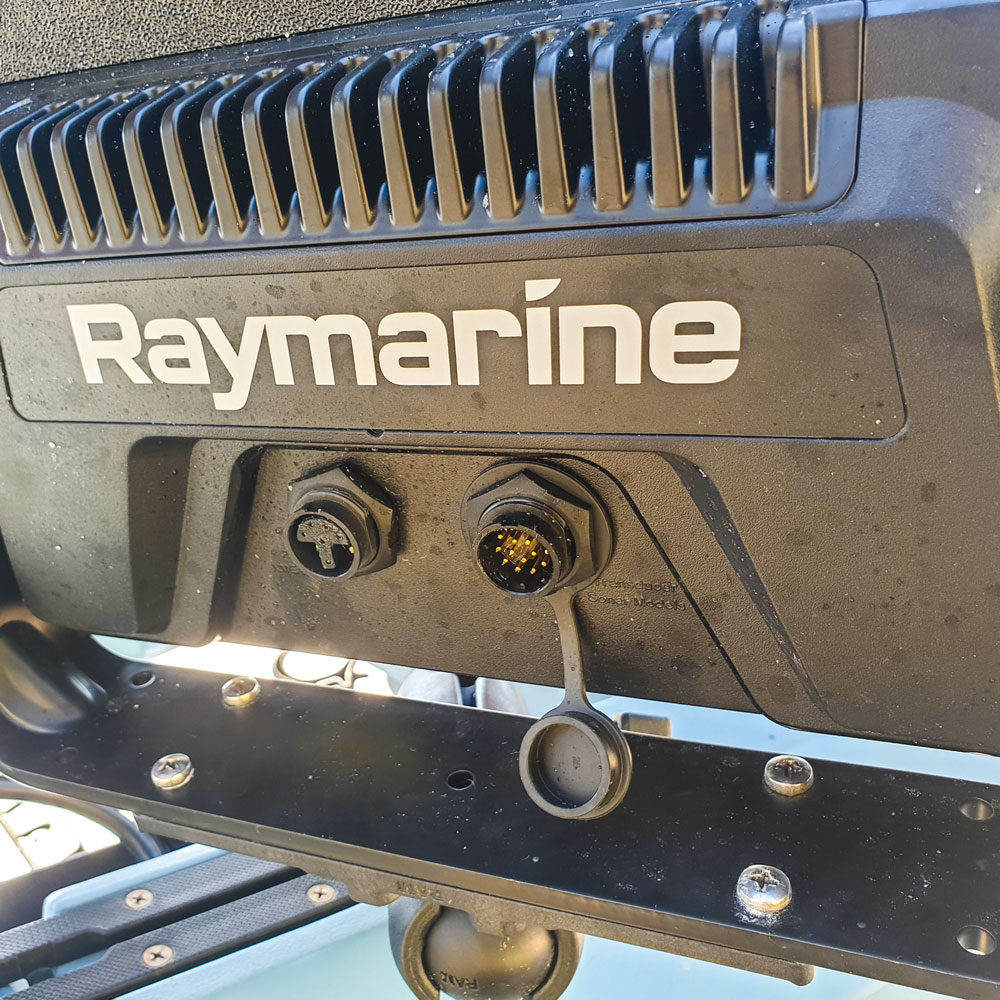
Di-Electric grease has been one of the best investments I’ve made in keeping the connections in good condition. The grease can be applied to all of your connector lips and flanges and works by expelling dirt and moisture. I place the grease over the whole connection and then clean the contact areas off as this grease does not conduct electricity. 
How to look after your electronics when installing a fish finder on a kayak 9
How to look after your electronics when installing a fish finder on a kayak 10

Most importantly, I also apply the grease around the connector lips before I install both the power and the transducer cables. Once these plugs are connected, I never remove them until they are dry, and my hands are dry. I leave my head unit on my kayak and will drive home with it plugged in. I’m careful that this is completely dry before I remove it. If I do get water in the connectors, I blow them off with compressed air.
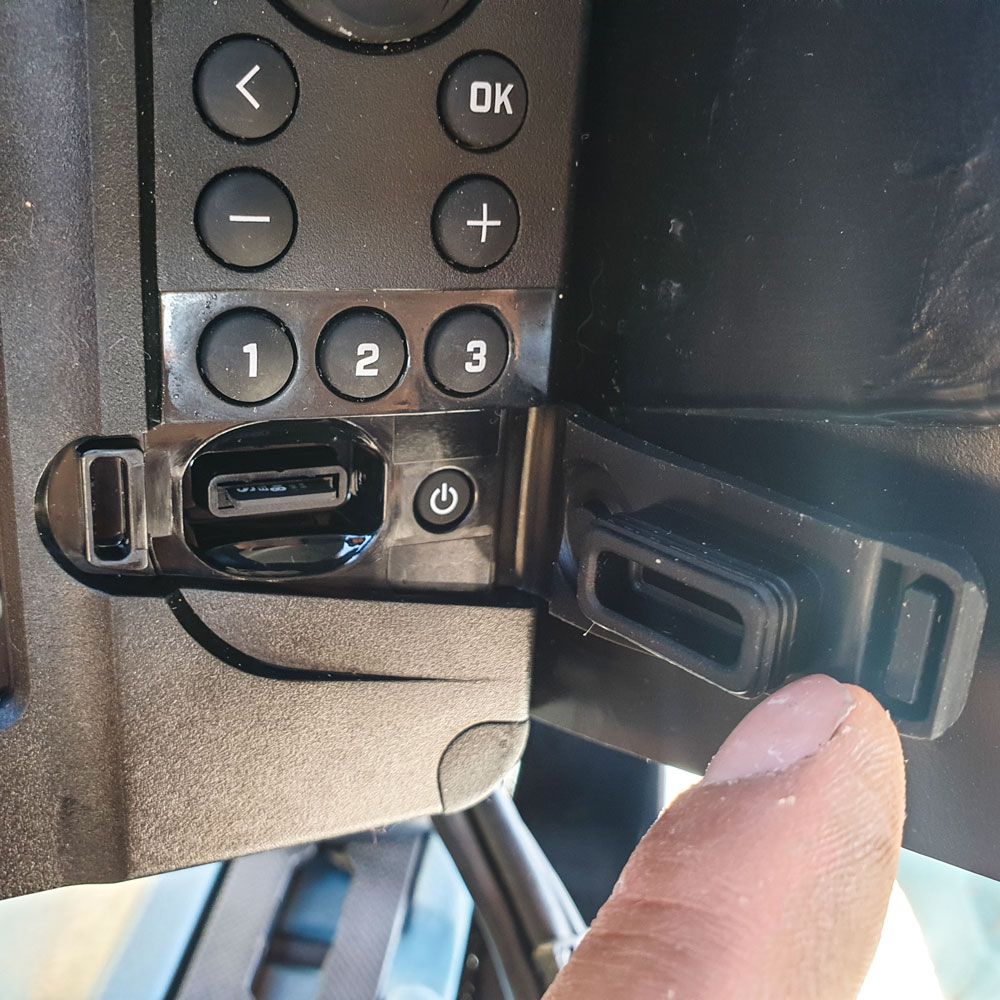
Making sure the card slots are dry
How to look after your electronics when installing a fish finder on a kayak 11

Card slots are known as a vulnerable place for water to get in and ruin your head unit. We designed the visors as an added protection to keep the water from splashing around the slot, plus we also apply di-electric grease around the seals after the card has is installed. Once again, I’ll never open this unless everything is dry, and I don’t have wet hands.
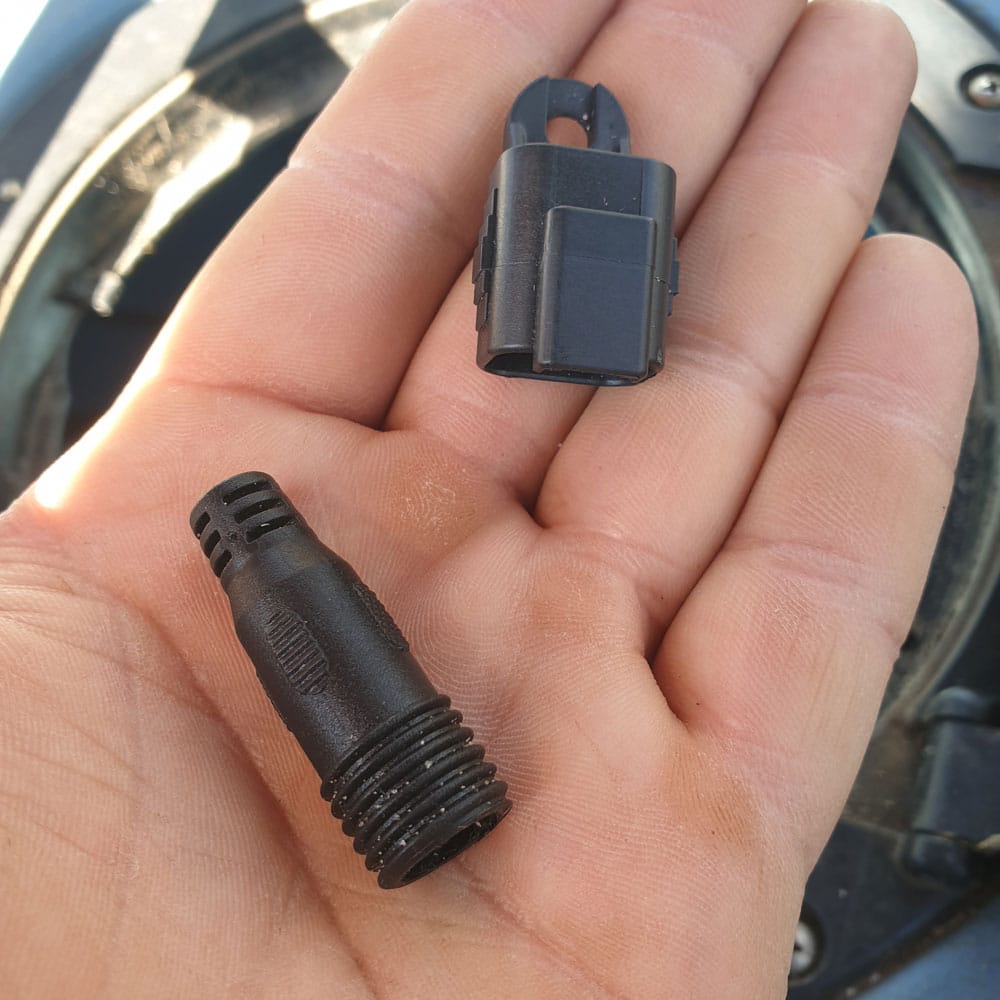
Waterproof Caps when not in use
How to look after your electronics when installing a fish finder on a kayak 12

After a session on the water, and everything is dry, I always remove my power supply. This is a 12V, 17.5ah FPV Lithium Battery, which then I don’t want the connection left exposed in the hull. These caps I use on both the FPV connector in the hull and on the Orb light connection. I never take these on the water with me but leave them in my car to ensure they are dry before I attach them to the connector. 

Hopefully, this helps you get some life out of your units and saves you from costly repairs and time off the water!

What are your Feelings
Share This Article :
  • Facebook
  • X
  • LinkedIn
  • Pinterest
Still stuck? How can we help?

How can we help?

Updated on February 28, 2025
How to Show Battery Voltage On Your Lowrance Fish Finder

Leave the first comment (Cancel Reply)


Table of Contents
  • When installing a fish finder on a kayak there are some critical things you should be doing to make sure it lasts.
Warranty and ReturnsDelivery PolicyPrivacy PolicyTerms and Conditions
Copyright © 2025 BerleyPro. All rights reserved. ABN: 62 894 992 858
Made with ❤ by TeeDigital