Skip to main content Skip to footer
  • Shop
      VisorsLowranceGarminHumminbirdRaymarineSimradB&GSpray DeflectorRooster Rooter
      Electrical and LightingBattery MountsConnector Protector
      Kayak TrolleyKimmi Cart
      Kayak LoaderWill-I-Loader
      Tasline Premium BraidTasline Elite X8 Tasline Elite X12
      Storage and OrganisersMirage BroPrison PocketJig BucketSide BroStow Bro
      Sounder MountsTransducer MountsBow Mount Bro
      Kayak AccessoriesBumper Bro Kayak Keel GuardHobieNative WatercraftVibeStickers and Decals
      Apparel and MoreClothingCaps and Hats
      Catch Fishing TackleFishing RodsFishing ReelsHooksSoft PlasticsJig HeadsJigsStickbaits and PoppersTackle and Storage BoxesTools and Accesories
  • Dealers
  • Resources
    • Installation Guides
    • Marty's Angling Adventures
  • About
  • Contact
  • My Account

Kayak Accesories

  • Hobie
    • Lowrance Eagle Triple Shot Ready Transducer Mount for Hobie Lynx / Passport Installation Guide
    • Installing a BerleyPro Bottom Drawer on a Hobie Outback
    • Hobie Passport/Lynx Hummingbird Compact SI Transducer Mount Installation Guide
    • Lowrance Eagle Triple Shot Ready Transducer Mount for Hobie Installation Guide
    • Krakka Yakkaz Hobie Compass Seat Risers
    • Nocqua Battery in a Hobie Pro Angler
    • Titan Tracks – Hobie Outback Installation
    • Hobie Pro Angler 14 Bumper Bro Installation
    • Hobie Passport 10.5 Bumper Bro Installation
    • Hobie Outback – Brudder Installation
    • Hobie Compass Lowrance Elite 9 FS Chart Plotter Installation
    • Hobie Mirage Lynx Side Bro Installation
    • Hobie Lynx/Passport Sidescan Transducer Mount Installation
    • Hobie Lynx Rear Bumper Bro Installation
    • Hobie Kayaks Passport 12 Bumper Bro Installation
    • Hobie Kayaks Outback (2019+) Bumper Bro Installation
    • Hobie Kayaks Compass Bumper Bro Installation
    • Hobie Kayaks Lynx Bow Bumper Bro Installation
    • Hobie Compass Seat Risers Installation
  • Native Watercraft
    • Native Watercraft 3″ Rudder Upgrade Install Guide
    • Native Water Craft Slayer Max / Titan X Rudder Upgrade install
    • Slayer Seat Risers
    • Slayer 10/13/Manta Propel Aluminium Handle Upgrade Installation
    • Titan Carry Handle Installation
    • Native Watercraft Ultimate FX Propel Live Well
    • Native Watercraft Titan Steering Installation
    • Native Watercraft Steering Tension Plate Installation
    • Native Watercraft Slayer Max Aluminium Handle Upgrade Installation
    • Native Watercraft Slayer 13 Bumper Bro Keel Protection Installation
    • Native Watercraft Slayer Max Steering Upgrade
    • Native Watercraft T-Lock Steering Installation
  • Crescent
    • Crescent Shoalie Bumper Bro Installation
    • Crescent Crew Bumper Bro Installation
    • Crescent CK1 Venture Bumper Bro Installation
    • Crescent CK1 Venture Rear Bumper Bro Installation
  • NuCanoe
    • NuCanoe UNLIMITED Bumper Bro Installation
    • NuCanoe Frontier 12 Bumper Bro Installation
  • Jackson
    • Jackson Bite FD Bumper Bro Installation
  • Old Town
    • OLD TOWN SPORTSMAN PDL 120 BUMPER BRO INSTALLATION
    • TITAN TRACKS – OLD TOWN INSTALLATION
    • Old Town Sportsman Autopilot 120 Bumper Bro Installation
  • Bonafide
    • Bonafide P127 Bumper Bro Installation
  • BOTE
    • BOTE HD Board Bumper Bro Installation
  • K2Fish
    • K2Fish Next GEN 11.5 Transducer Mount Installation
  • Vibe
    • Vibe Kayaks Sea Ghost 110 Bumper Bro Installation
    • Vibe Kayaks Shearwater 125 Bumper Bro Installation
  • Bumper Bro
    • BerleyPro Bumper Bro Kayak Keel Guard Installation
    • Bumper Bro Adjustment Process
  • Kimmi Cart
    • Kimmi Cart – C Tug Axle Assembly
    • Kimmi Cart – Wheeleez 24/30cm Wheel Axle

Fishfinder Accessories

  • Visors
    • Garmin
      • Garmin Echomap UHD2 Touch – Visor Installation
    • Lowrance
      • Lowrance Eagle Triple Shot Ready Transducer Mount for Hobie Lynx / Passport Installation Guide
      • Lowrance Eagle Triple Shot Ready Transducer Mount for Hobie Installation Guide
      • Lowrance Eagle 7″ and 9″ – Visor Installation
      • How To Show Battery Voltage On a Lowrance TI Fish Finder
      • Lowrance TripleShot Ready
      • Lowrance Active Imaging 3-in-1 Transducer Installation on a Hobie
      • Lowrance Elite 5 HDI – Visor Installation
      • Lowrance HOOK Reveal 7″ and 9″ – Visor Installation
      • Lowrance HOOK2/HOOK Reveal 5 – Visor Installation
      • Lowrance HDS Live – Visor Installation
    • Simrad
      • Simrad – Visor Installation
  • Transducer Mounts and Accessories
    • Lowrance Eagle Triple Shot Ready Transducer Mount for Hobie Lynx / Passport Installation Guide
    • Lowrance Eagle Triple Shot Ready Transducer Mount for Hobie Installation Guide
    • Rooster Rooter – Garmin Installation
    • Rooster Rooter – Installation Guide for Lowrance (Simrad) ActiveImaging HD 3-in-1 FishReveal Transducer
    • StructureScan 3d Transducer mount for a Hobie
  • Connector Protector
    • Connector Protector Installation
  • Tips And Tricks
    • Fitting a Fishing Gimble / Fighting Belt Correctly
    • Rigging Up A Soft Plastic
    • Marine-Proofing Your GPS and Fish Finder: Tips and Tricks for Long-Lasting Performance
    • How to Show Battery Voltage On Your Lowrance Fish Finder
    • How to look after your electronics when installing a fish finder on a kayak

Storage and Organisers

  • Kayak Storage and How to Set Up Your Kayak

Electrical and Lighting

  • BerleyPro Orb 360 Degree Kayak Light Installation
View Categories
  • Home
  • Guides
  • Kayak Accesories
  • Kimmi Cart

Kimmi Cart – Wheeleez 24/30cm Wheel Axle

The Kimmi Cart now comes partly assembled to make life even easier. It’s a quick and simple process to have your new kayak transporter ready for action:
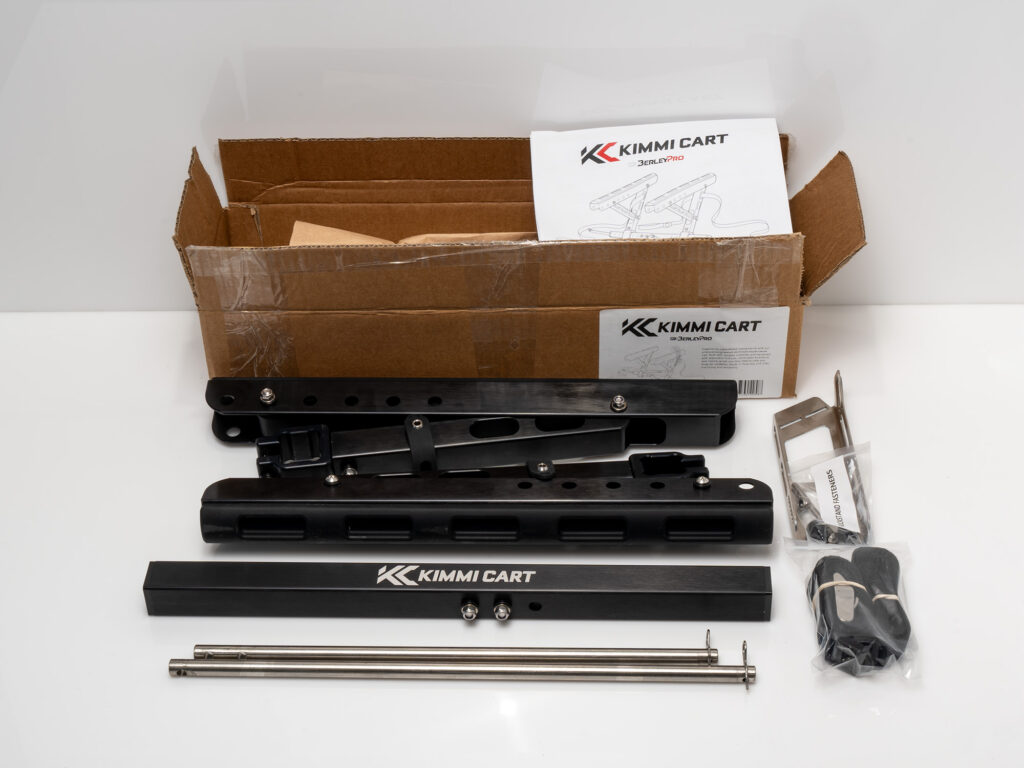
Unpacking the Kimmi Cart, it now comes partly assembled for your convenience
Kimmi Cart WheelEze 30 unboxing, kayak bunks, bunk arms, axle, kickstand, fastening kit, tiedown straps

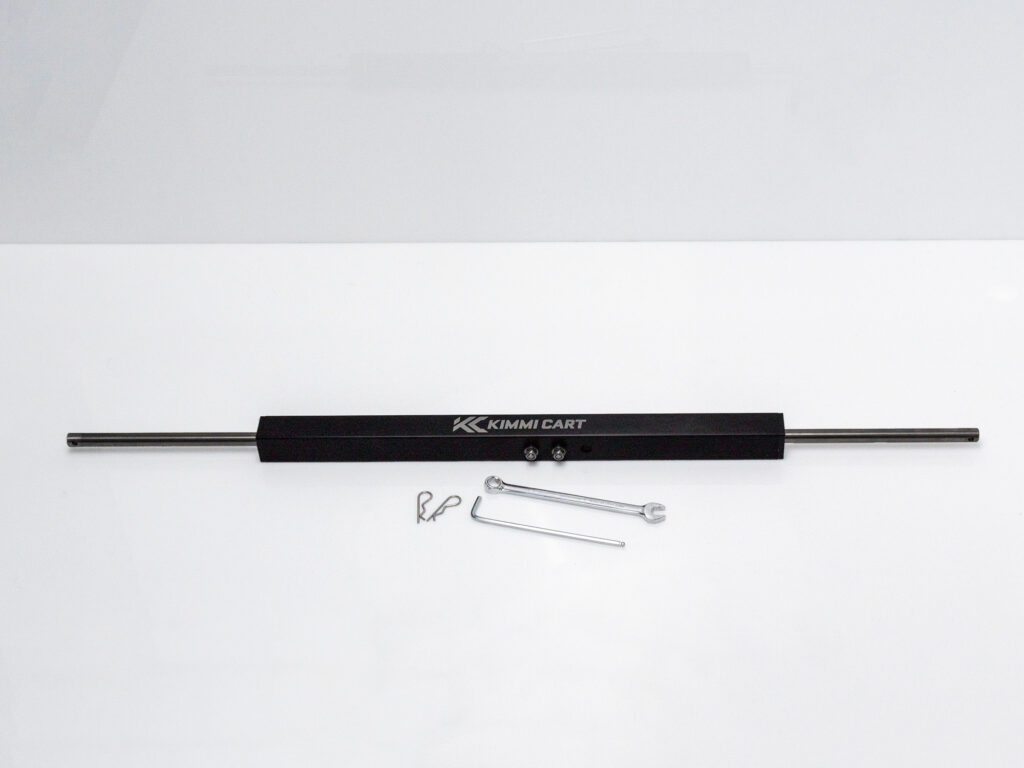
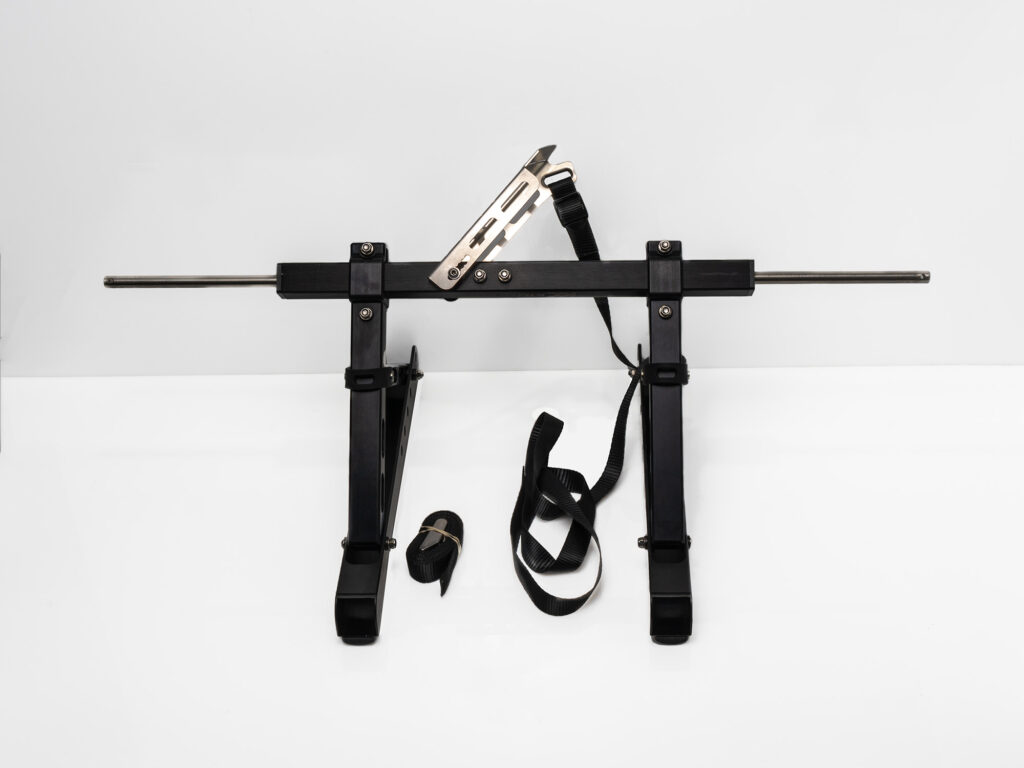
Step 1: Unpack the box: Unpack the box and you’ll discover 2x kayak bunks and their arms, one axle housing, 2x axles and R-clips (or lynch pins), the kick stand and fastening kit, and the tie down straps. For assembly all you will need is a 4mm hex key (Allen key/wrench) and a 10mm spanner

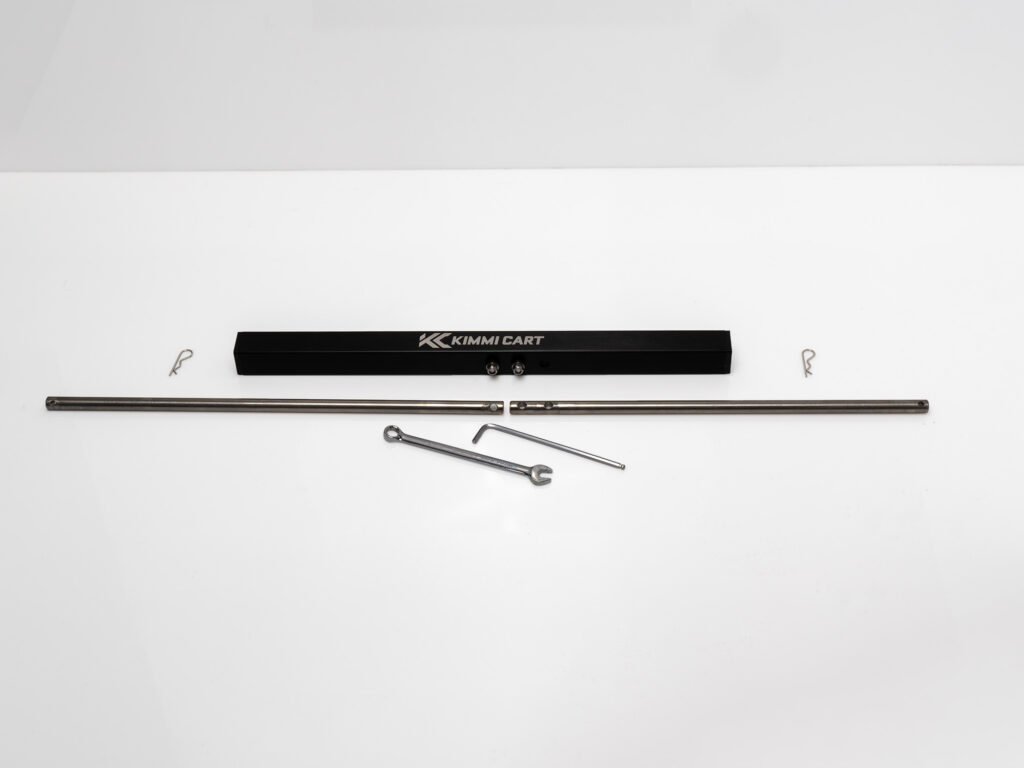
Start with the axles by lining them against the housing to show left and right sides
Check the stub axles against the axle housing to find left ane right axle shafts
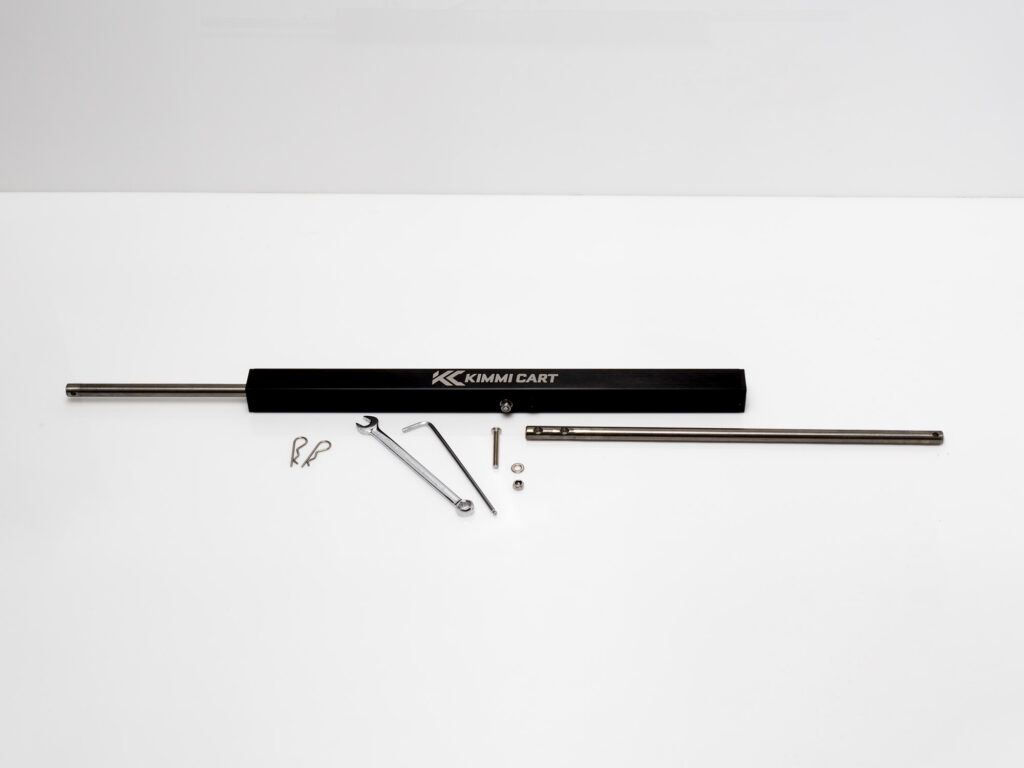
Add one axle at a time to the axle housing to ensure correct hole alignment with the intenal spacer
Add one axle at a time to the axle housing to ensure correct hole alignment with the intenal spacer, stub axle, axle housing
The axle assembly completed
The axle assembly completed consisting of axle housing, stub axles, axle bushing, internal axle spacer

Step 2: Start with assembling the axles into the axle housing: The easiest way to find which way round they’re assembled is to lay the axles beside the housing and line up the holes. Simply remove one machine screw, washer and nut, and install that axle before proceeding with the other. Always make sure the black plastic spacers between the stainless screws and aluminum parts go back in place.
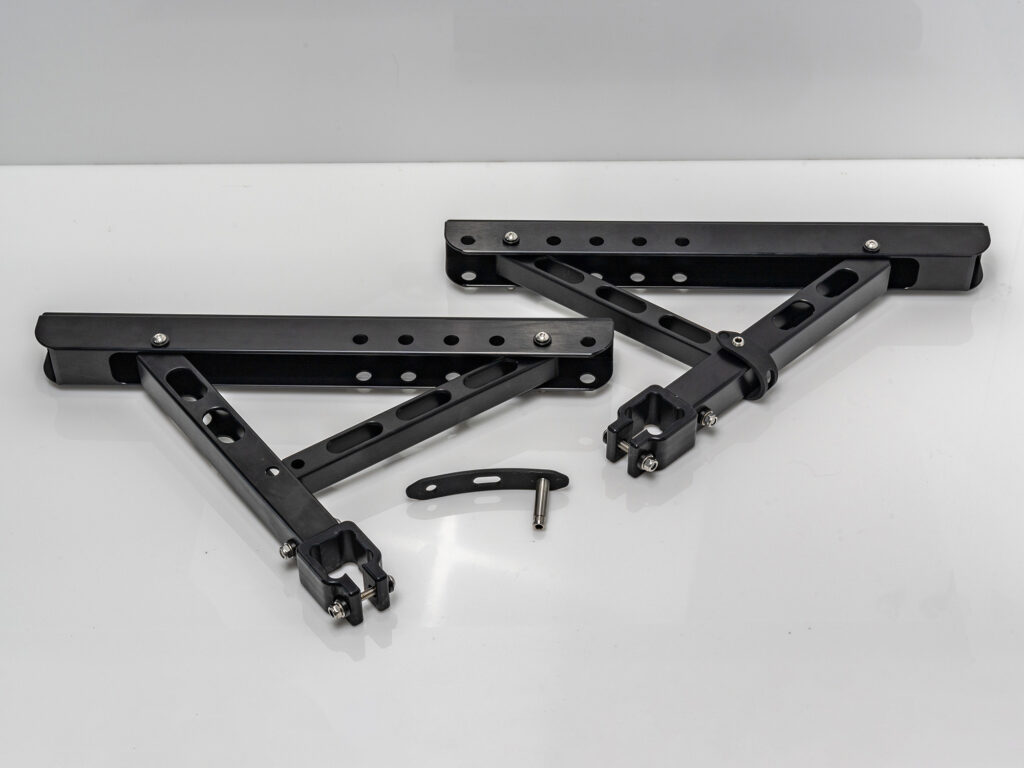
Kimmi Cart kayak bunks and arms can be unfolded and set up

Step 3: Unfold and set the kayak bunks: This couldn’t be easier, simply unfold each arm, remove the release pin (the silicone strap pulls off the tapered end), align the holes, then replace the pin. This is the Kimmi Cart folding mechanism once fully assembled.

Install the kayak bunk assemblies on the axle by sliding them over the ends and tightening the nut and screw
Line up the kayak bunk assemblies with the axle for alighnment, bunk arms
Align the Kimmi Cart kayak bunk arms on the axle housing using the fitting label as a guide
Align the Kimmi Cart kayak bunk arms on the axle housing using the fitting marks as a guide

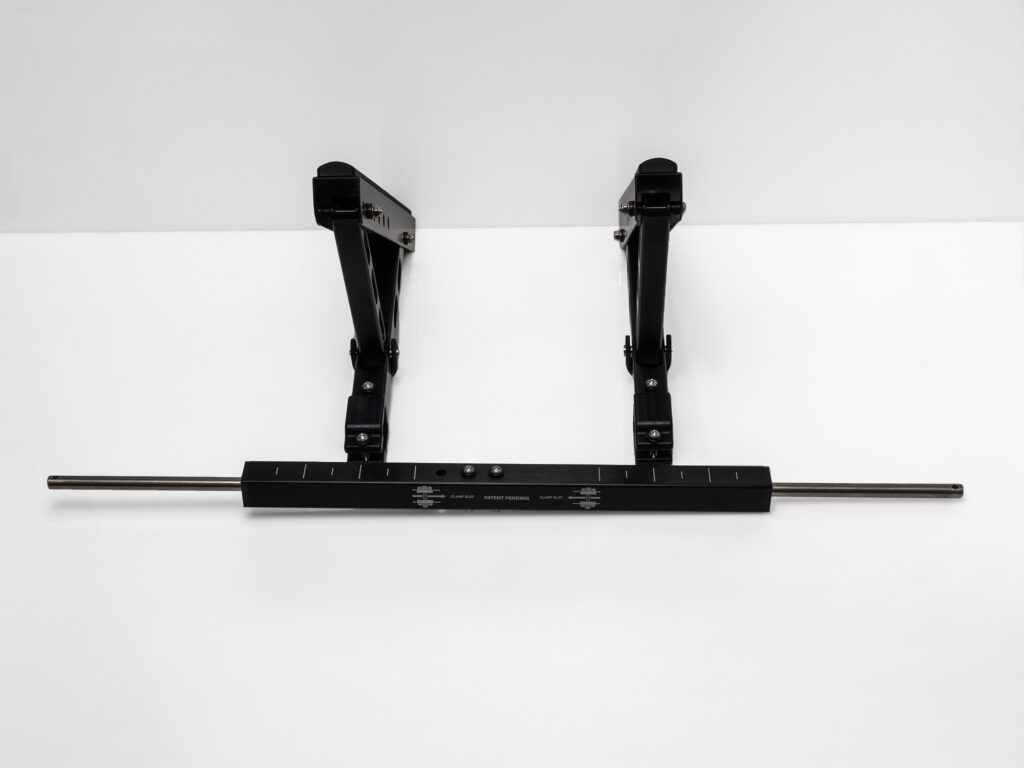
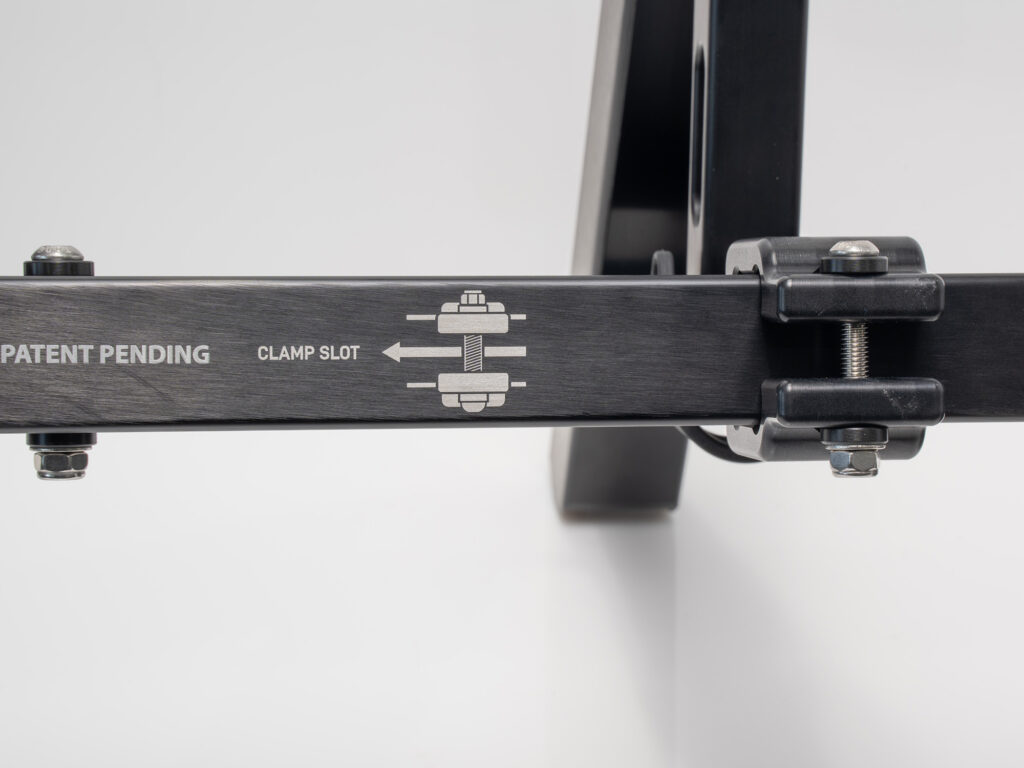
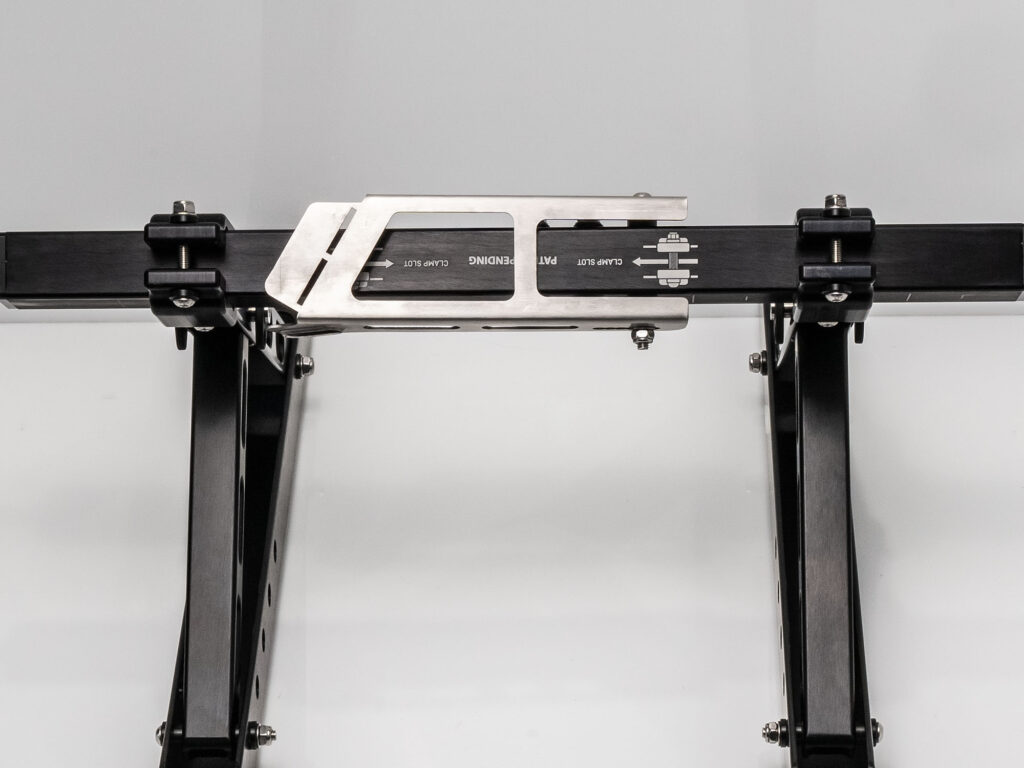
Step 4: Fit the arms and axle assembly together: To fit the arms lay the axle assembly on the floor with the “KIMMI CART” label facing away, and the alignment ruler facing up. Now stand the arms on their backs behind, with the clamps on the floor. This is the correct alignment for sliding them over the axle ends and into position. Note that the open slot end of the clamps should end up aligning with the “CLAMP SLOT – PATENT PENDING – CLAMP SLOT” labeling on the axle assembly. Space the bunk arms to fit your kayak hull (the index marks on top of the axle help ensure even spacing) then tighten the clamping screws. Please Note: excessive force isn’t needed as the clamps have ample surface area for a secure grip.

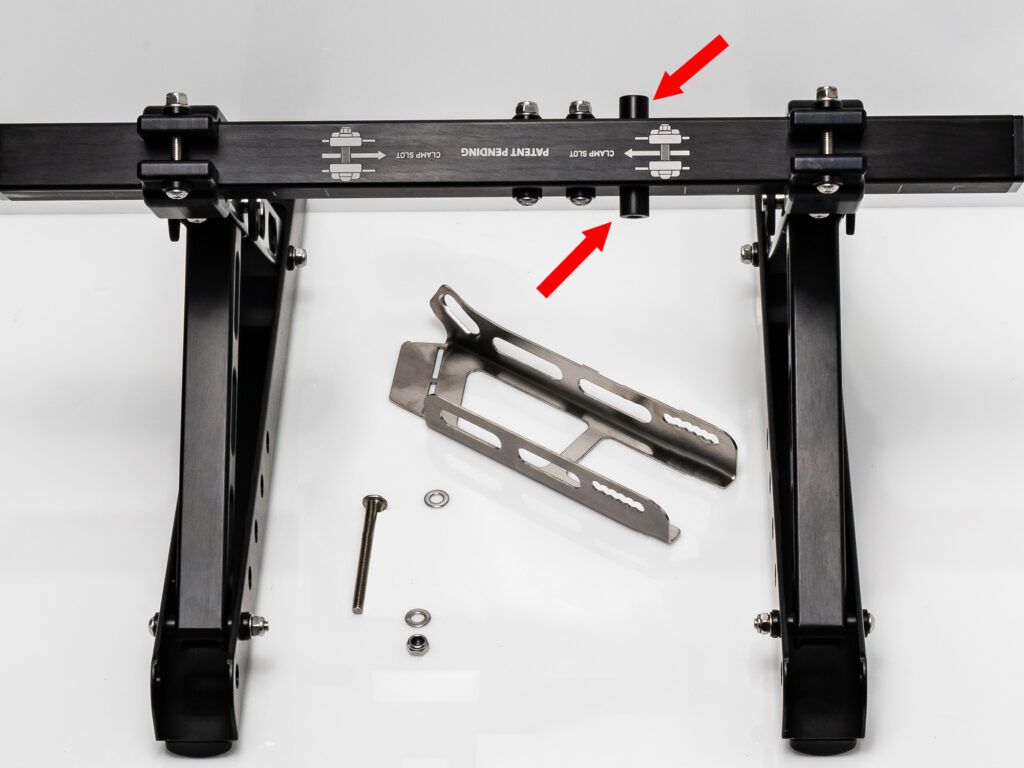
Install the Kimmi Cart kickstand bushes as indicated as they are essential for correct operation
The Kimmi Cart kickstand bushes are essential for correct operation
The Kimmi Cart kickstand should be a friction fit and fold over the axle

Step 5: Fit the kick stand: Lay the Kimmi Cart on the kayak bunks with the axle assembly in the air. The kick stand is fitted over the “CLAMP SLOT – PATENT PENDING – CLAMP SLOT” label using the 2x plastic spacers, M6 x 70 machine screw, 2x washers, and nyloc nut. This is tightened to a light friction fit so the kick stand can be moved easily, but will still support the Kimmi Cart when standing upright on its wheels. The adjustment slot on the kickstand allows the cart to accommodate a variety of wheel diameters – adjust the position to suit your needs. The tab at the foot end of the kick stand has slots cut to make it easy to bend with pliers for a bigger footprint on soft surfaces if needed. Please note: the plastic spacers must be installed as indicated for a correct friction fit and operation of the kickstand.

When fitting the Kimmi Cart tiedown straps start with kickstand and the strap without a buckle
The Kimmi Cart tiedown strap with the stainless camlock buckle is fitted to the opposite leg
Fit the second tiedown strap to the opposite Kimmi Cart height adjust leg
Run the Kimmi Cart tiedown straps through the middle or top slot of the height adjustment arms

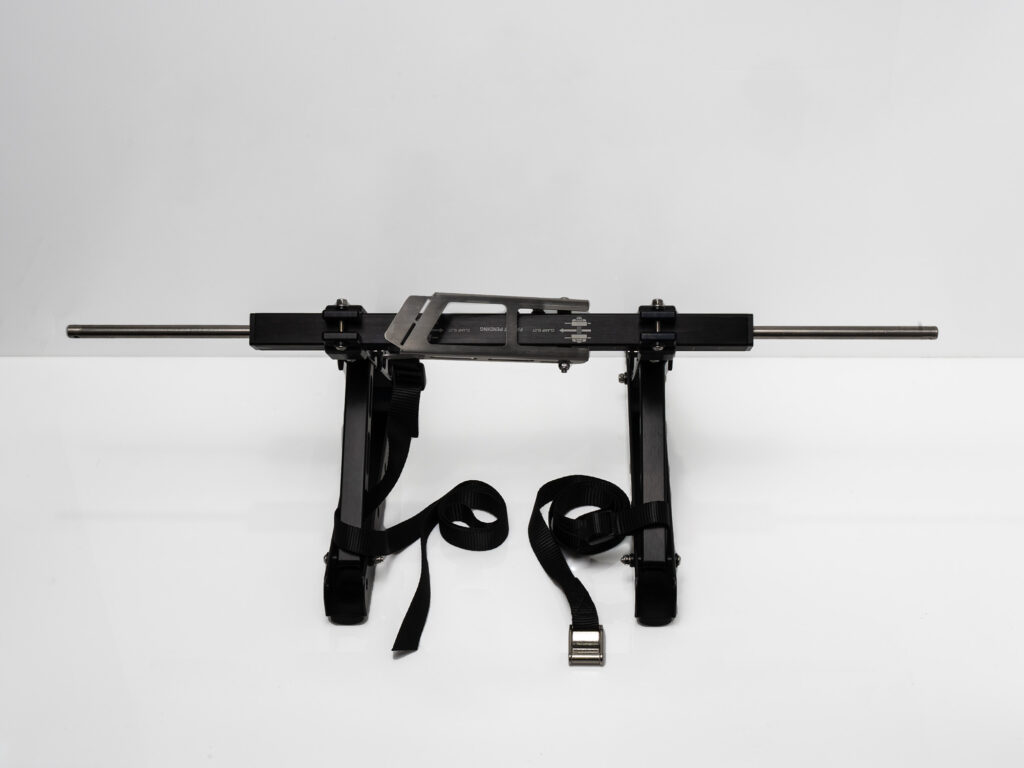
Step 6: Fit the tie-down straps: Start with the plain strap without the stainless camlock buckle attached. Fit the plain strap to the tapered slot at the toe of the kickstand using the provided nylon buckle. The long end can then be routed up through the middle or top slot of the height adjustment bar (as shown above) on the opposite side of the Kimmi Cart. When this strap is tightened to secure your kayak on top of the Kimmi Cart the tension will automatically raise the kickstand for you. The other strap with the stainless steel camlock buckle can then be attached to the middle or top slot of the other height adjustment bar. Please note: if your straps rub on the wheels you’ve chosen for your Kimmi Cart shift the straps to the end slots immediately below the kayak bunks.
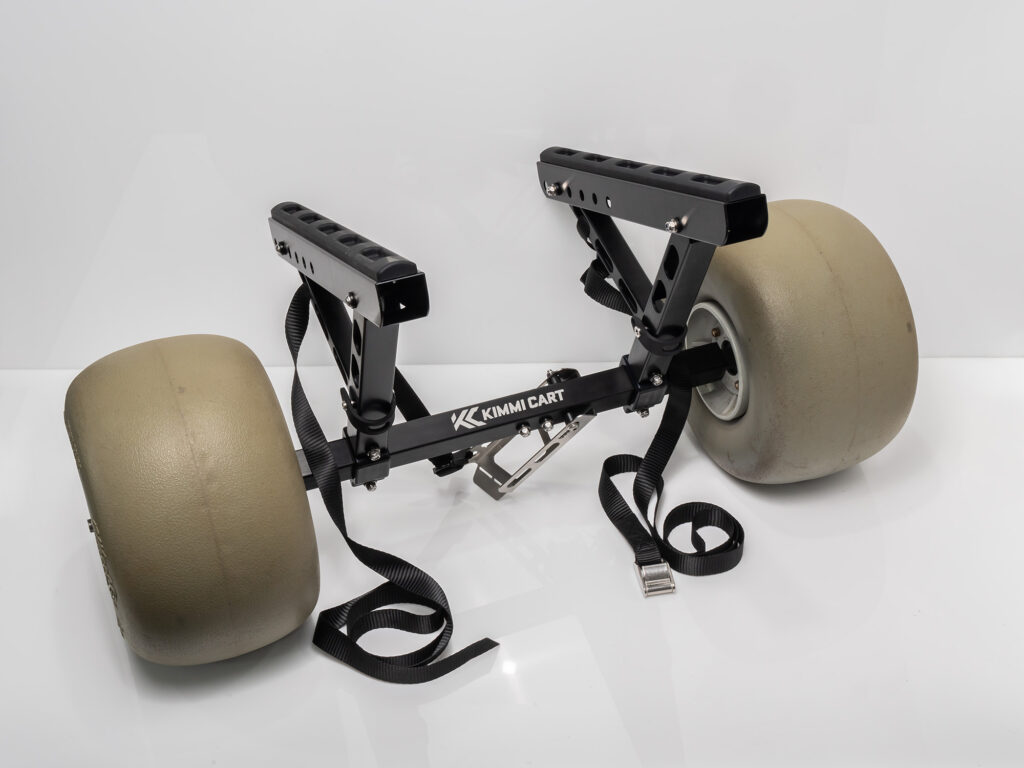
Final step: fit the wheels and check the kickstand has enough friction to keep it upright

Step 7: Fit wheels and final check: Your wheels can now be fitted using the lynch pins (or R-clips) provided and the Kimmi Cart stood upright on its kickstand. Adjust the kickstand screw tension so it has just enough resistance to keep the cart upright for loading your kayak. If needed, the height adjustable arms can be moved to any of the other hole positions to place your kayak just above your wheels without them rubbing on the hull.
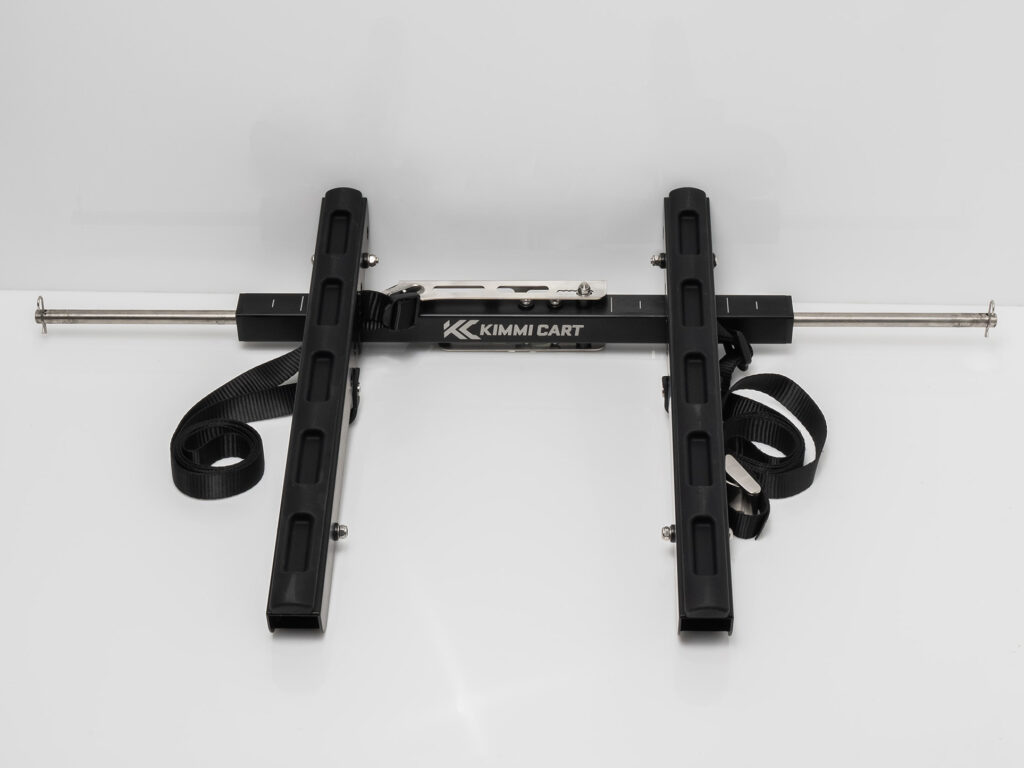
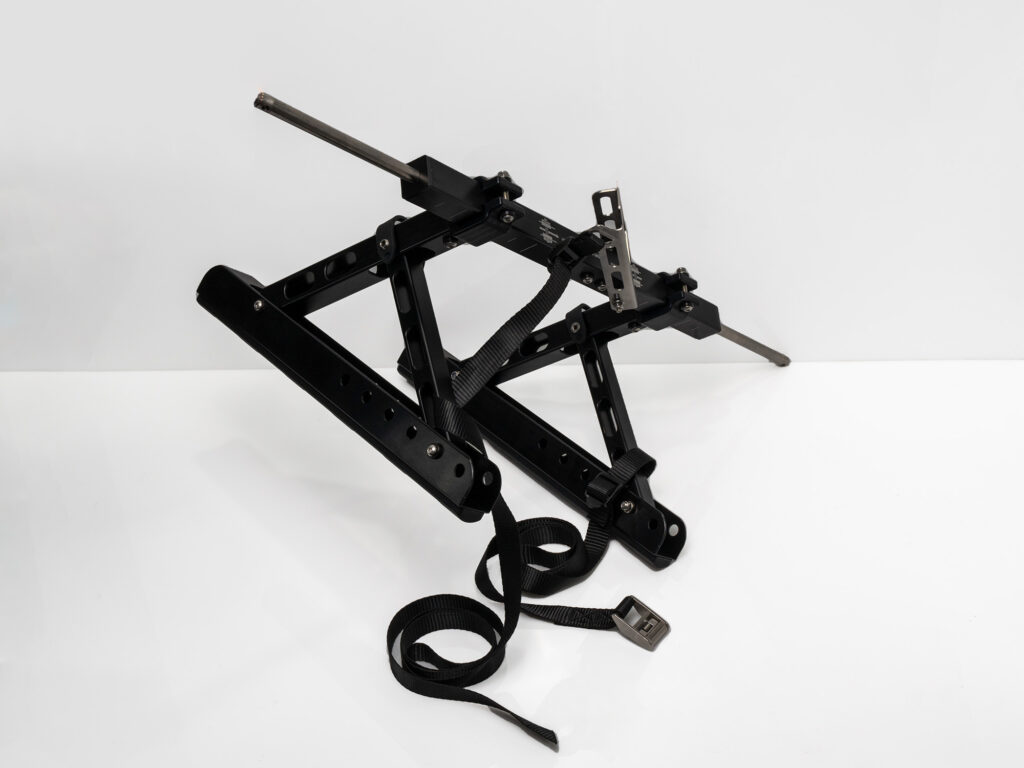
The Kimmi Cart collapsed flat and ready for transport
The Kimmi Cart collapsed flat and ready for transport, folded flat

To fold your Kimmi Cart for easy transport simply remove the wheels then remove the release pins to free the other ends of the height adjustment arms (reverse of Step 3 above). These arms then fold inside the kayak bunk arms allowing the cart to fold flat. The release pins should always be reinserted in their holes in the legs for safe storage.

Please note that some components may appear different to those in the images here. This Kimmi Cart has axles and lynch pins to suit C-Tug wheels. Kimmi Carts supplied to suit Wheeleez wheels will have solid axles and R-clips as retainers.
What are your Feelings
Share This Article :
  • Facebook
  • X
  • LinkedIn
  • Pinterest
Still stuck? How can we help?

How can we help?

Updated on March 1, 2025
Kimmi Cart – C Tug Axle Assembly

Leave the first comment (Cancel Reply)


Warranty and ReturnsDelivery PolicyPrivacy PolicyTerms and Conditions
Copyright © 2025 BerleyPro. All rights reserved. ABN: 62 894 992 858
Made with ❤ by TeeDigital